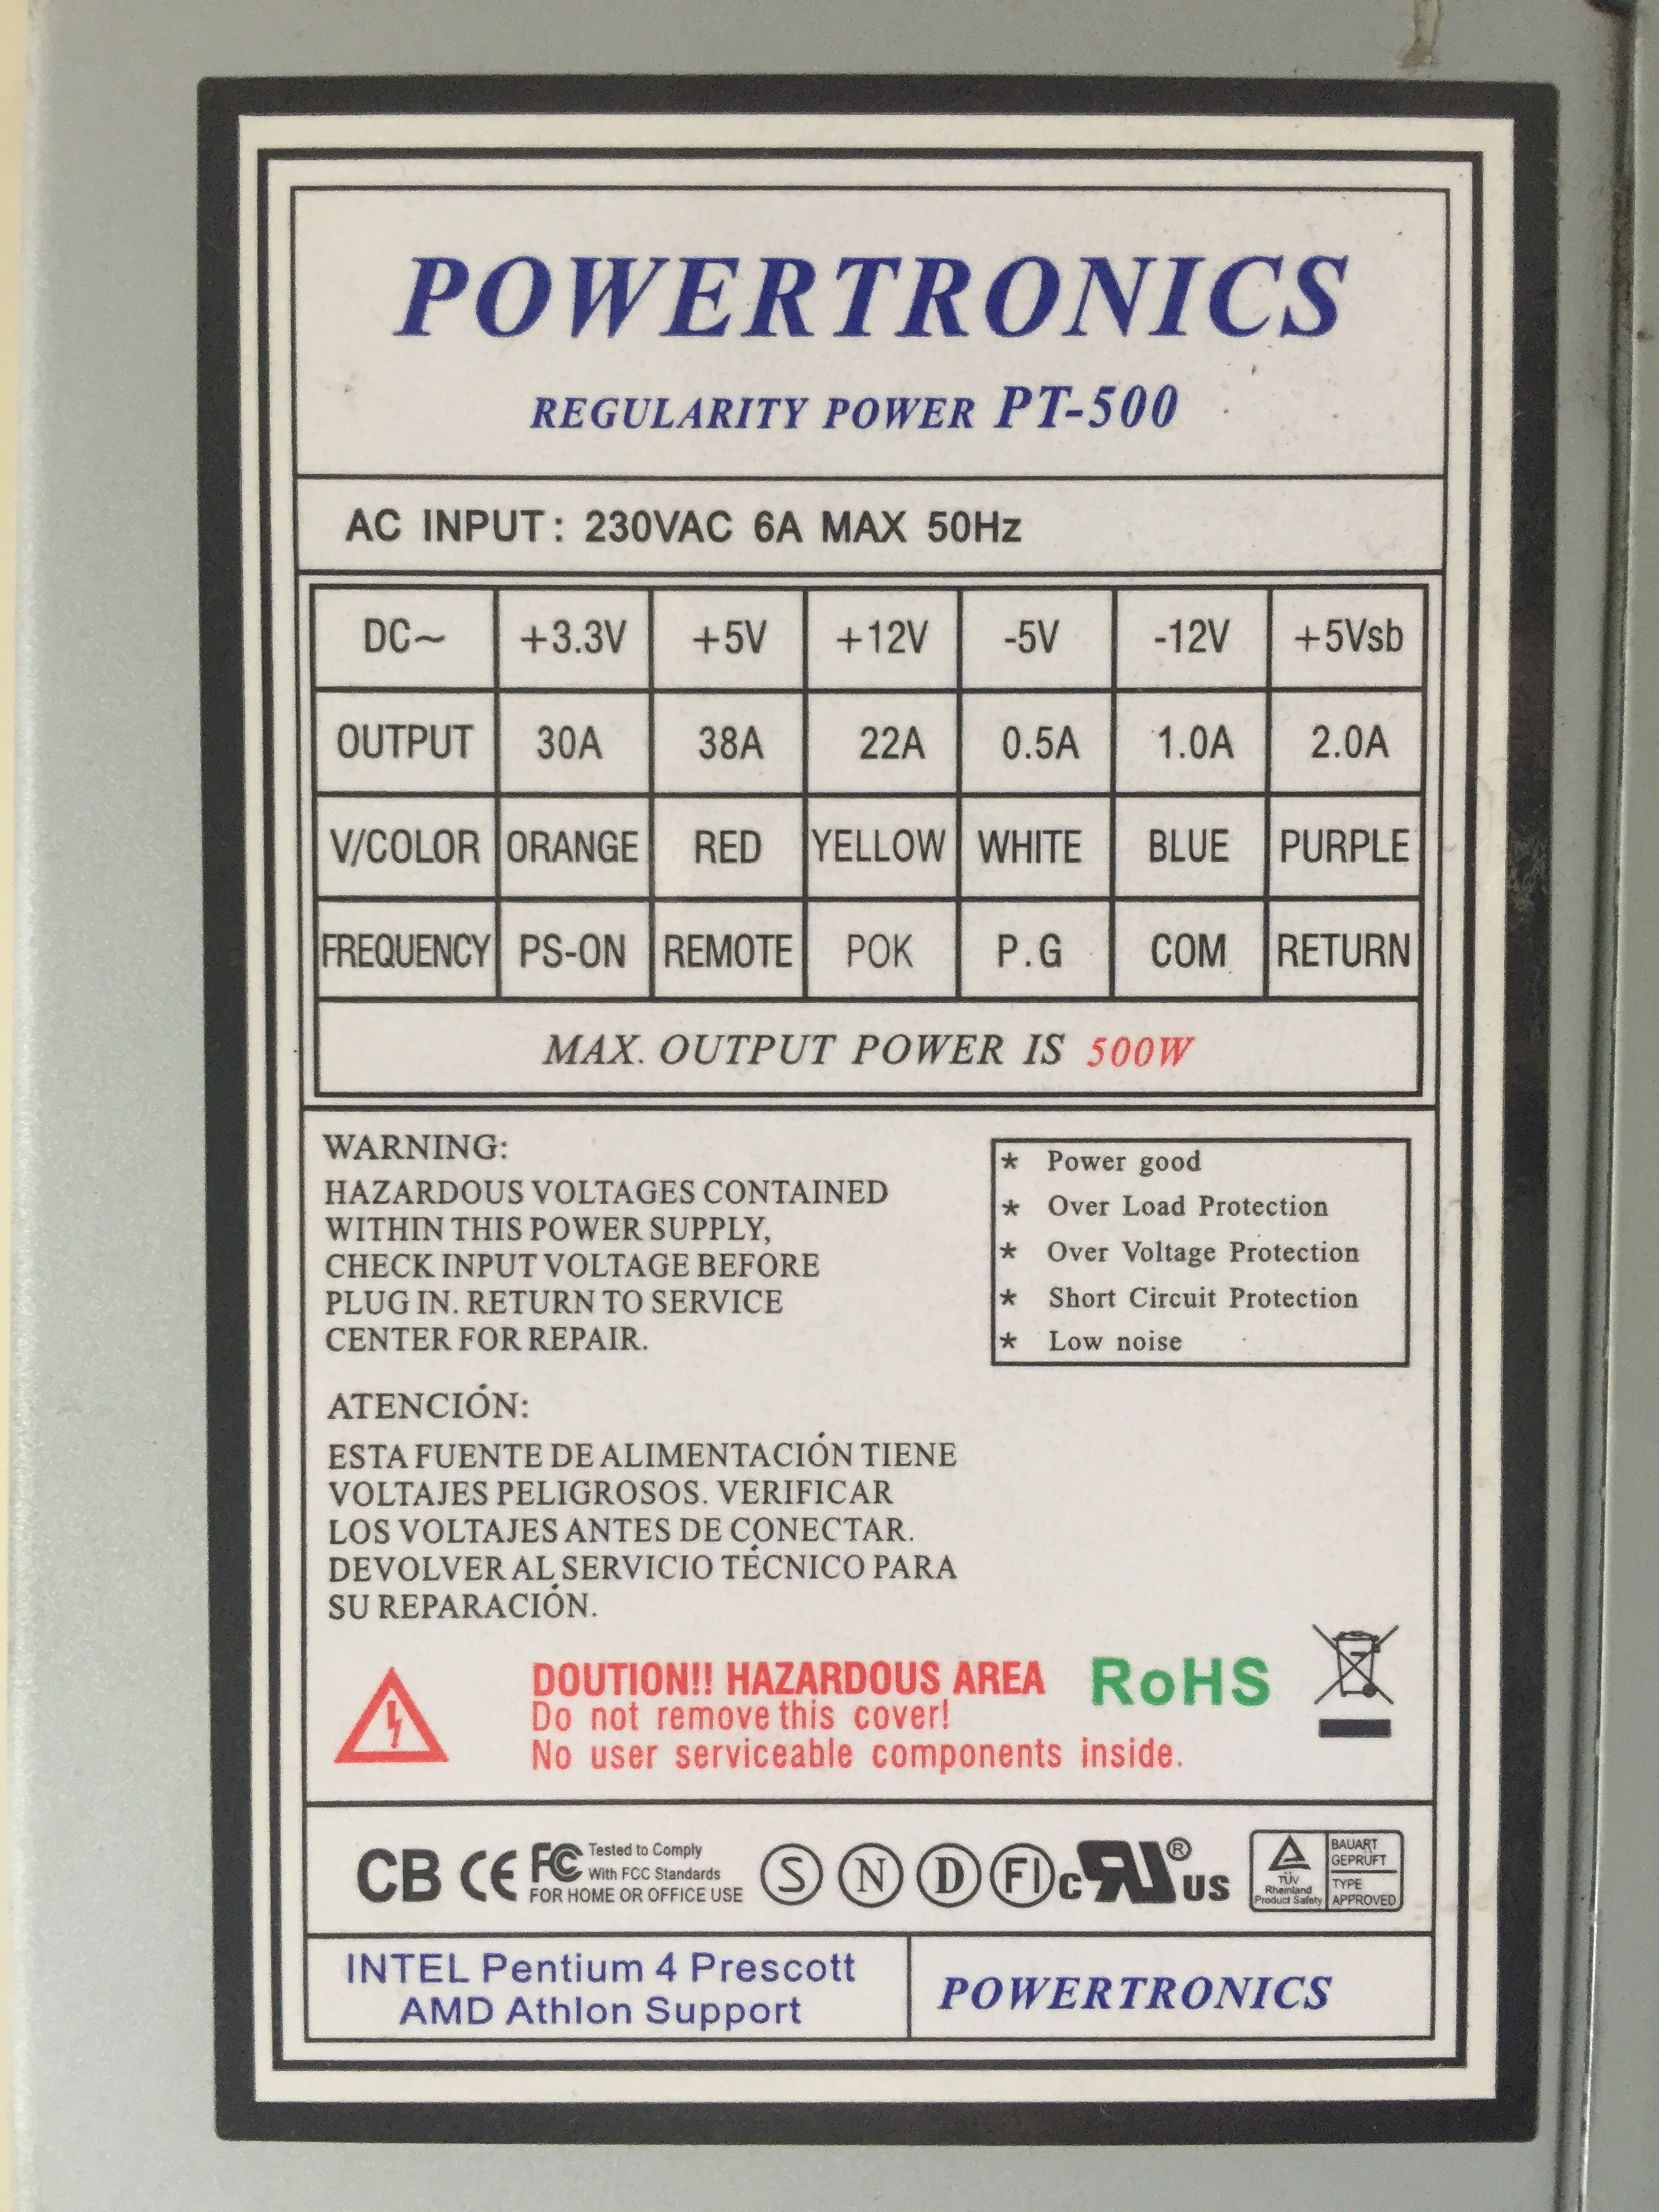
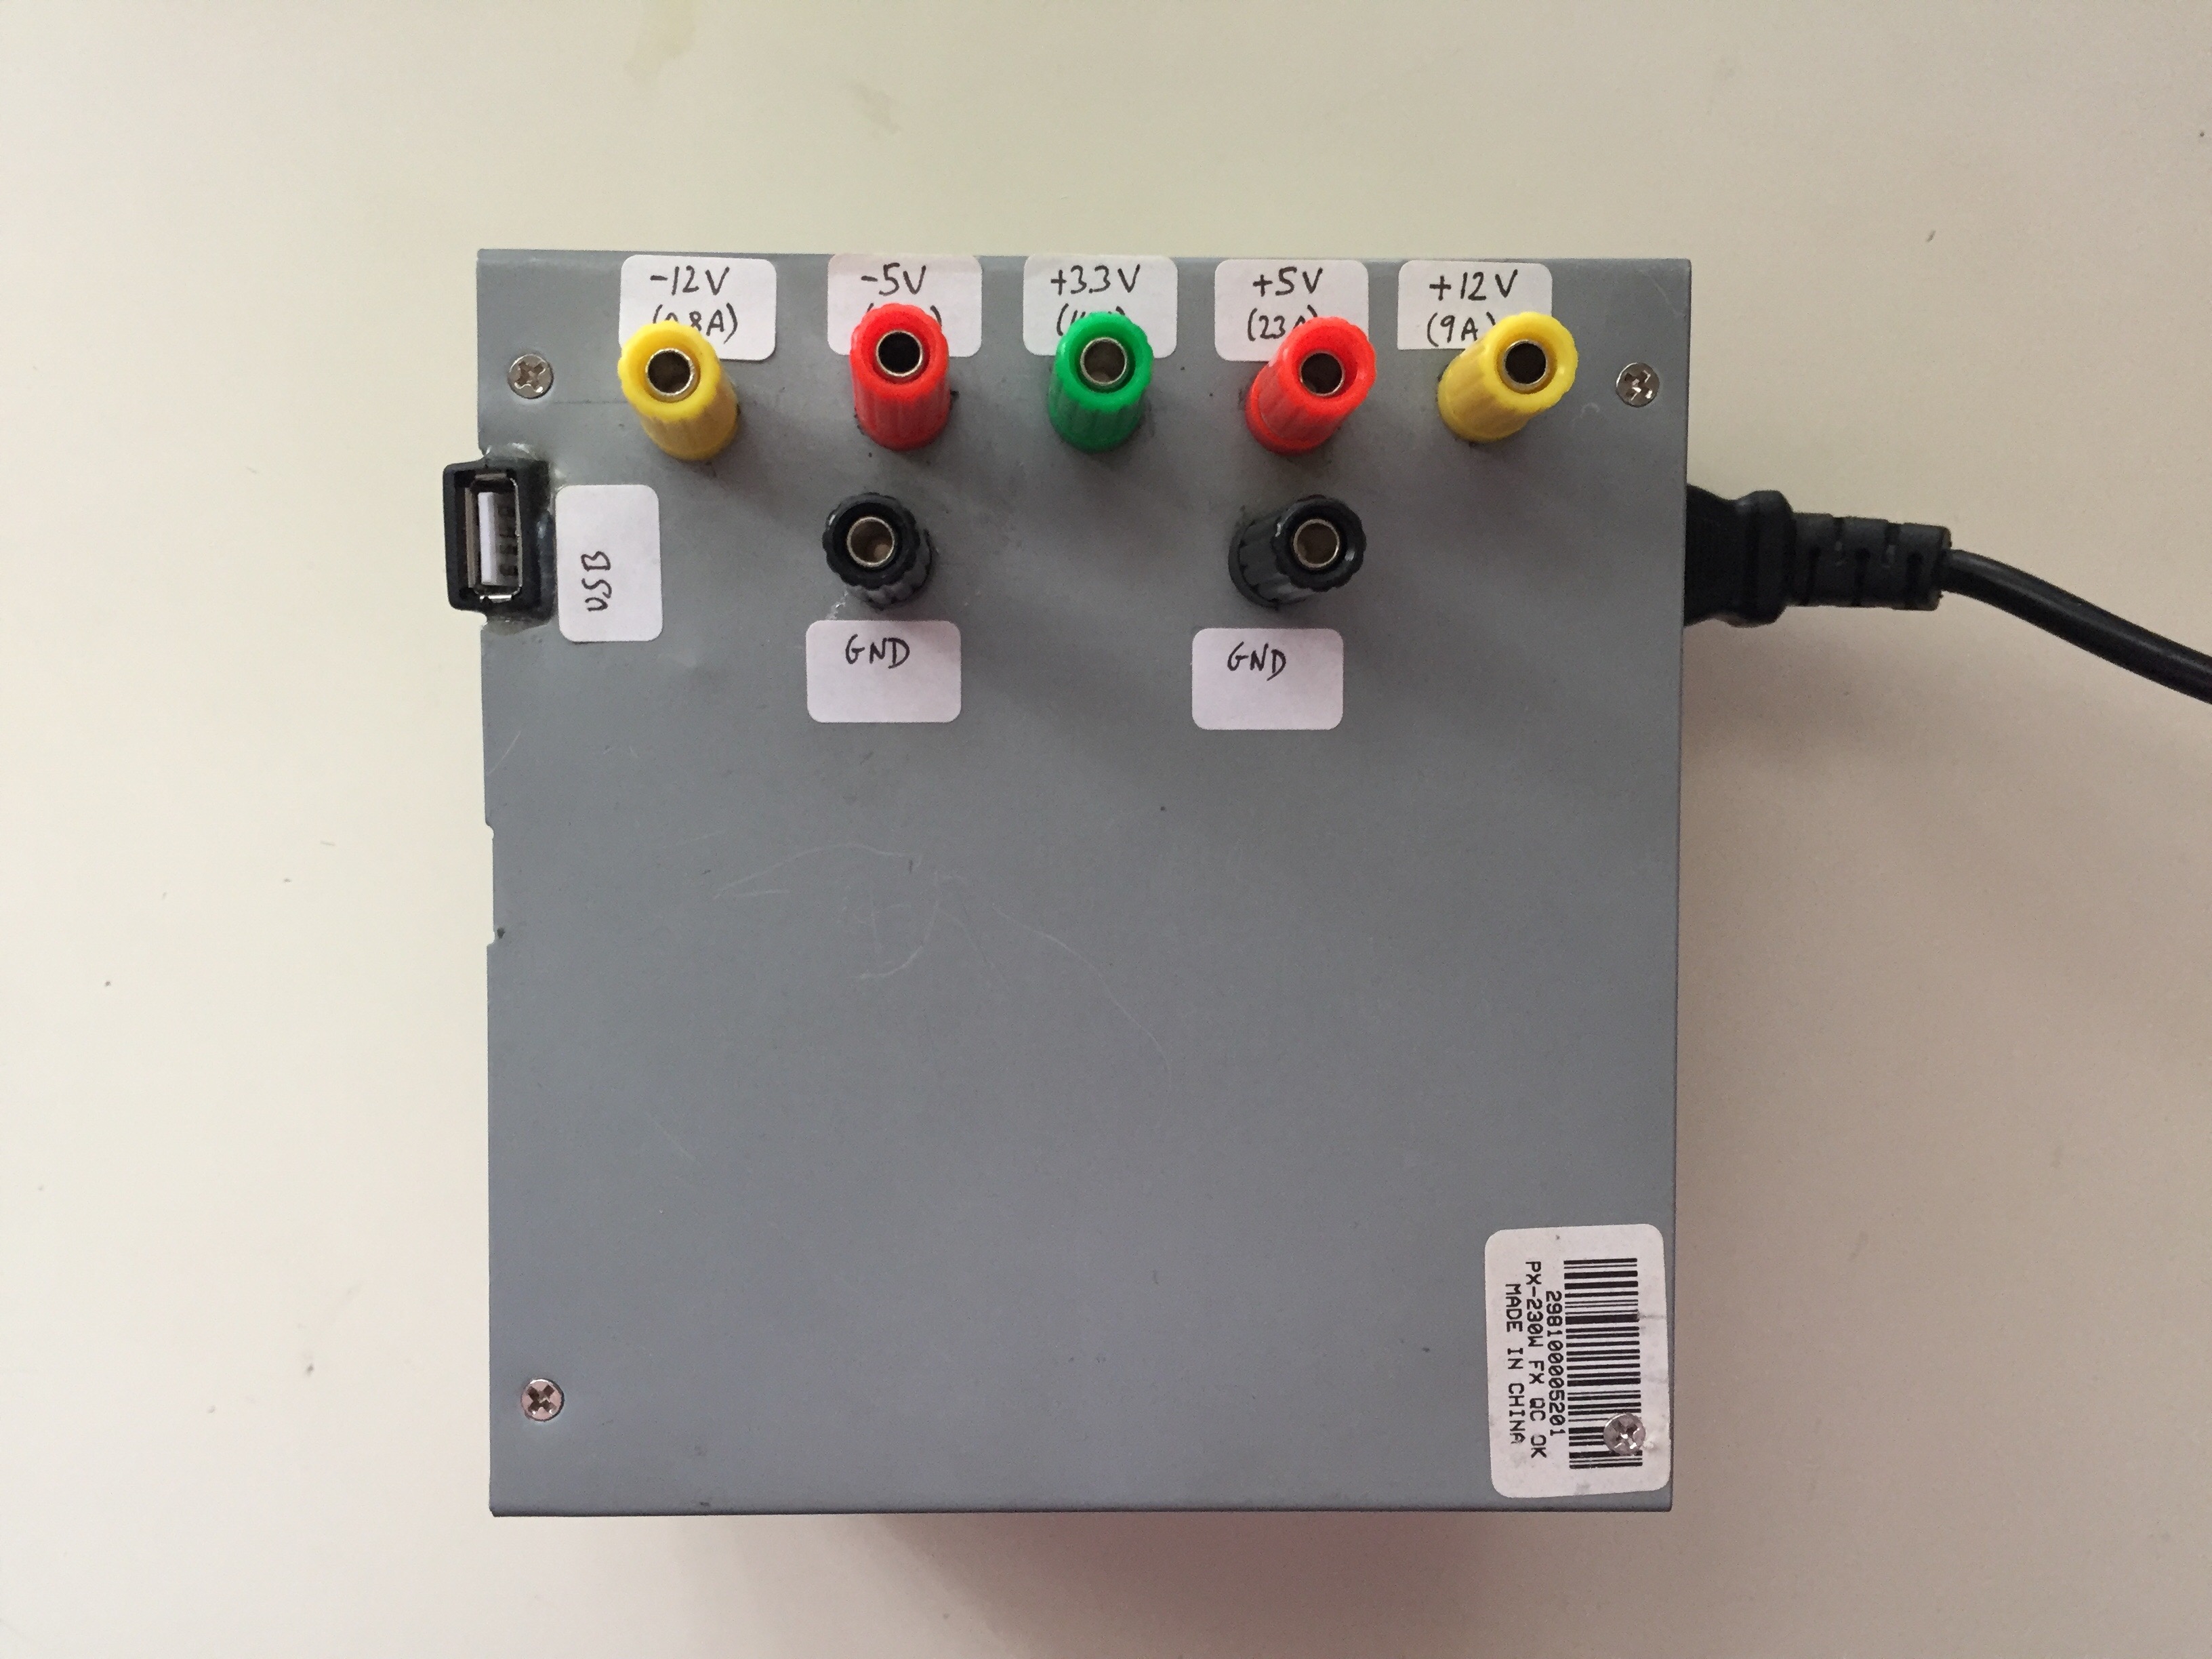
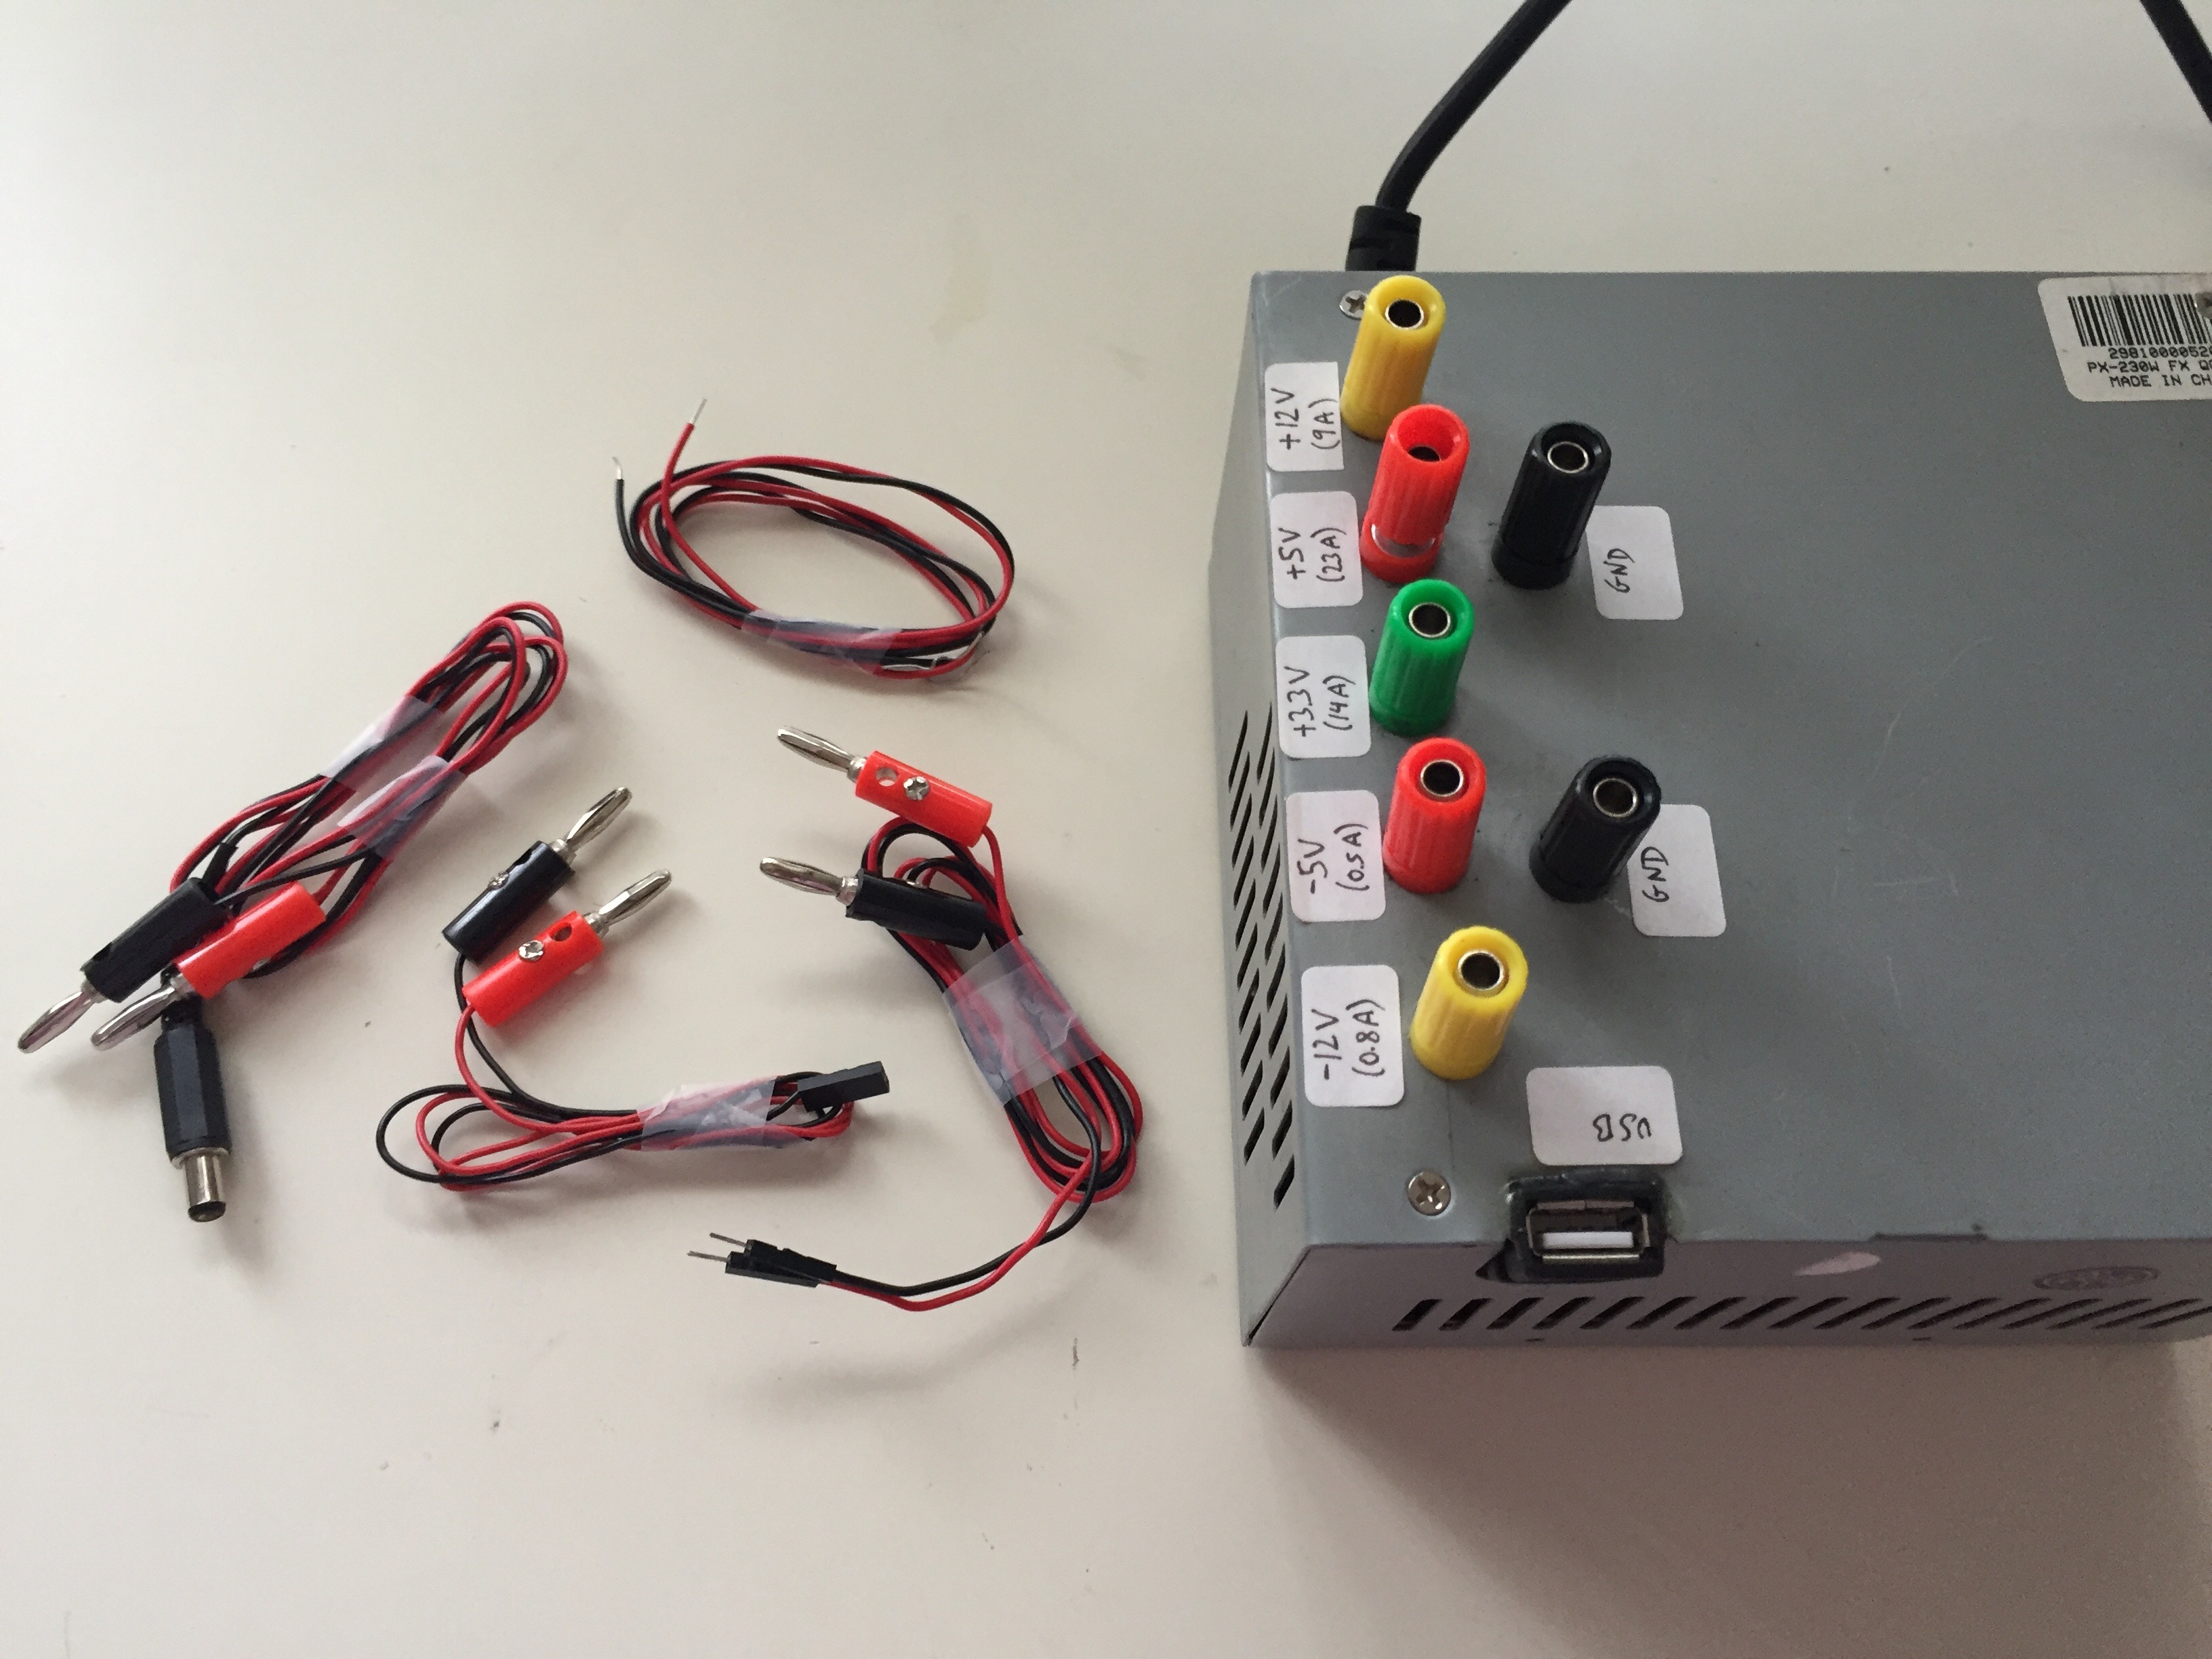
Para trabajar con todo tipo de «inventos» es muy útil tener una fuente de alimentación. Las fuentes de ordenador de sobremesa se pueden adaptar de forma muy fácil para esto, y suministran (sin necesidad de hacer nada) diferentes voltajes:
+3.3 V
+5 V
+12 V
-12 V
(Combinando los anteriores podemos obtener otros voltajes, naturalmente).
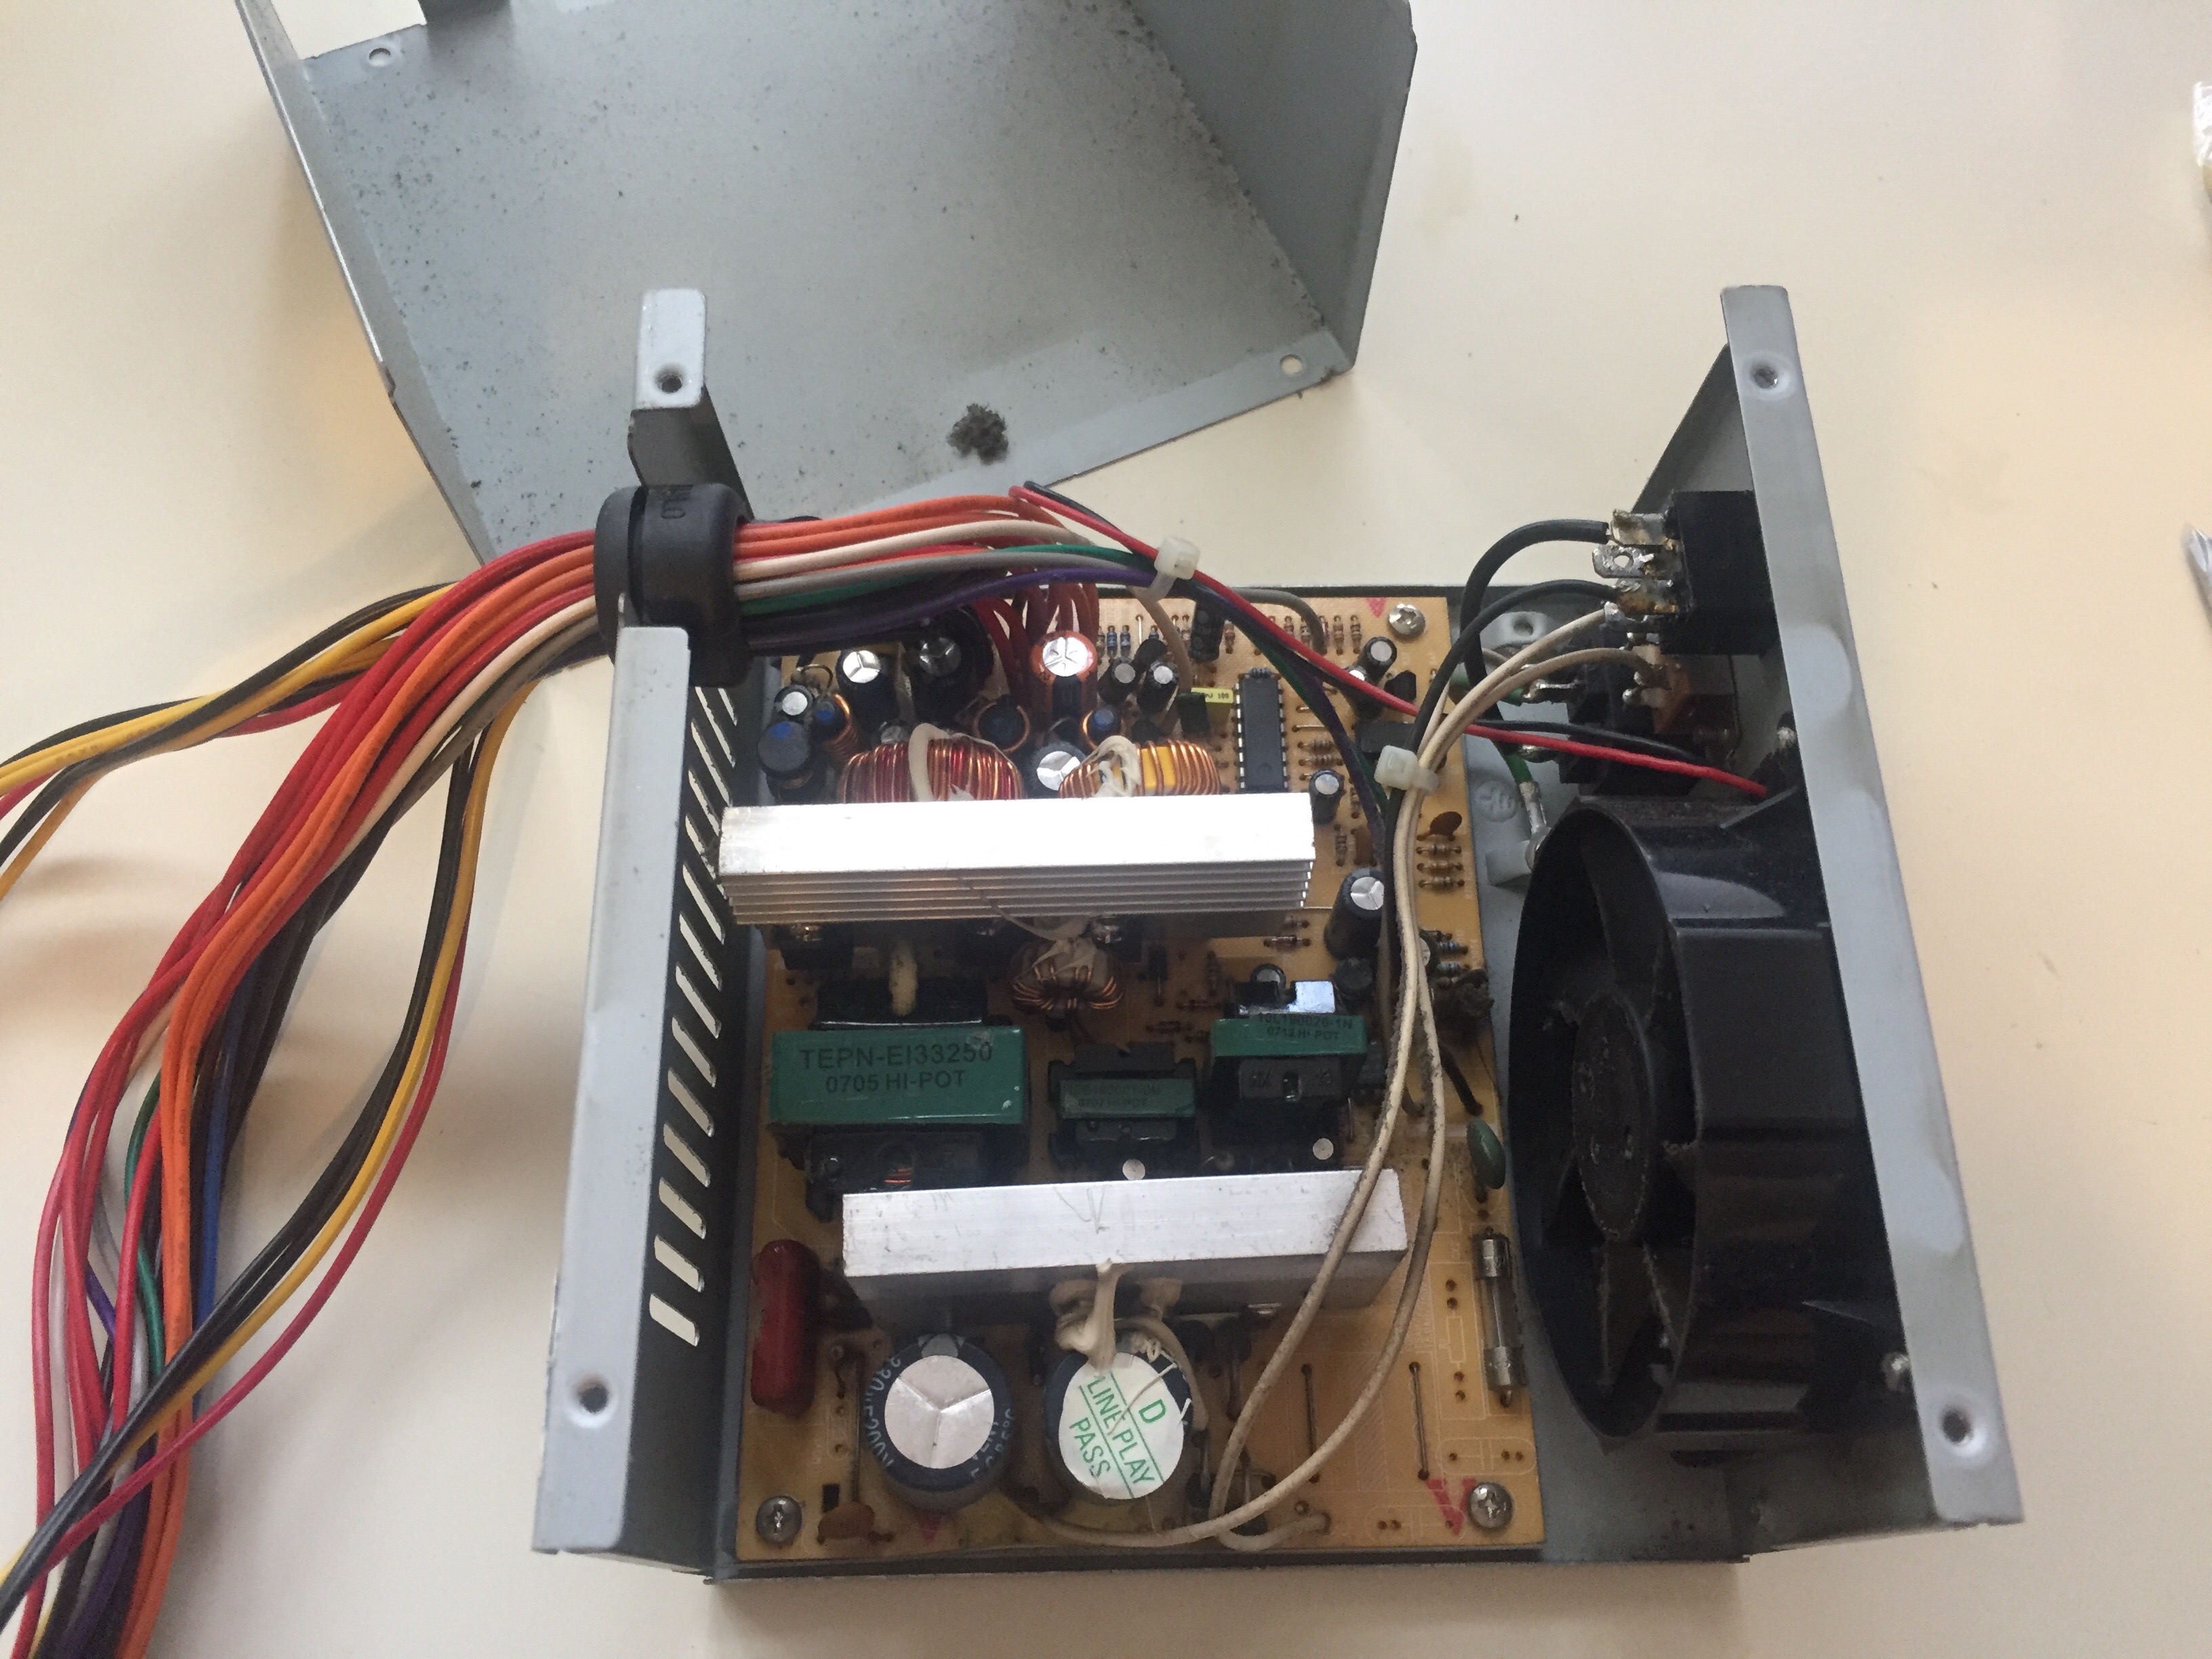
Hay inifinidad de tutoriales por internet en el que explican cómo hacer esto, aunque relamente no hace falta un tutorial porque es cortar cables y listo.
Como puntos a destacar, para que arranque la fuente es necesario puentear el cable verde a cualquier cable tierra (negro). Y en función de lo antigua que sea la fuente será necesario añadir una resistencia o no; en mi caso no fue necesario.
Para hacer los agujeros en la cargasa recomiendo empezar con pequeños taladros y luego hacerlos más grandes.
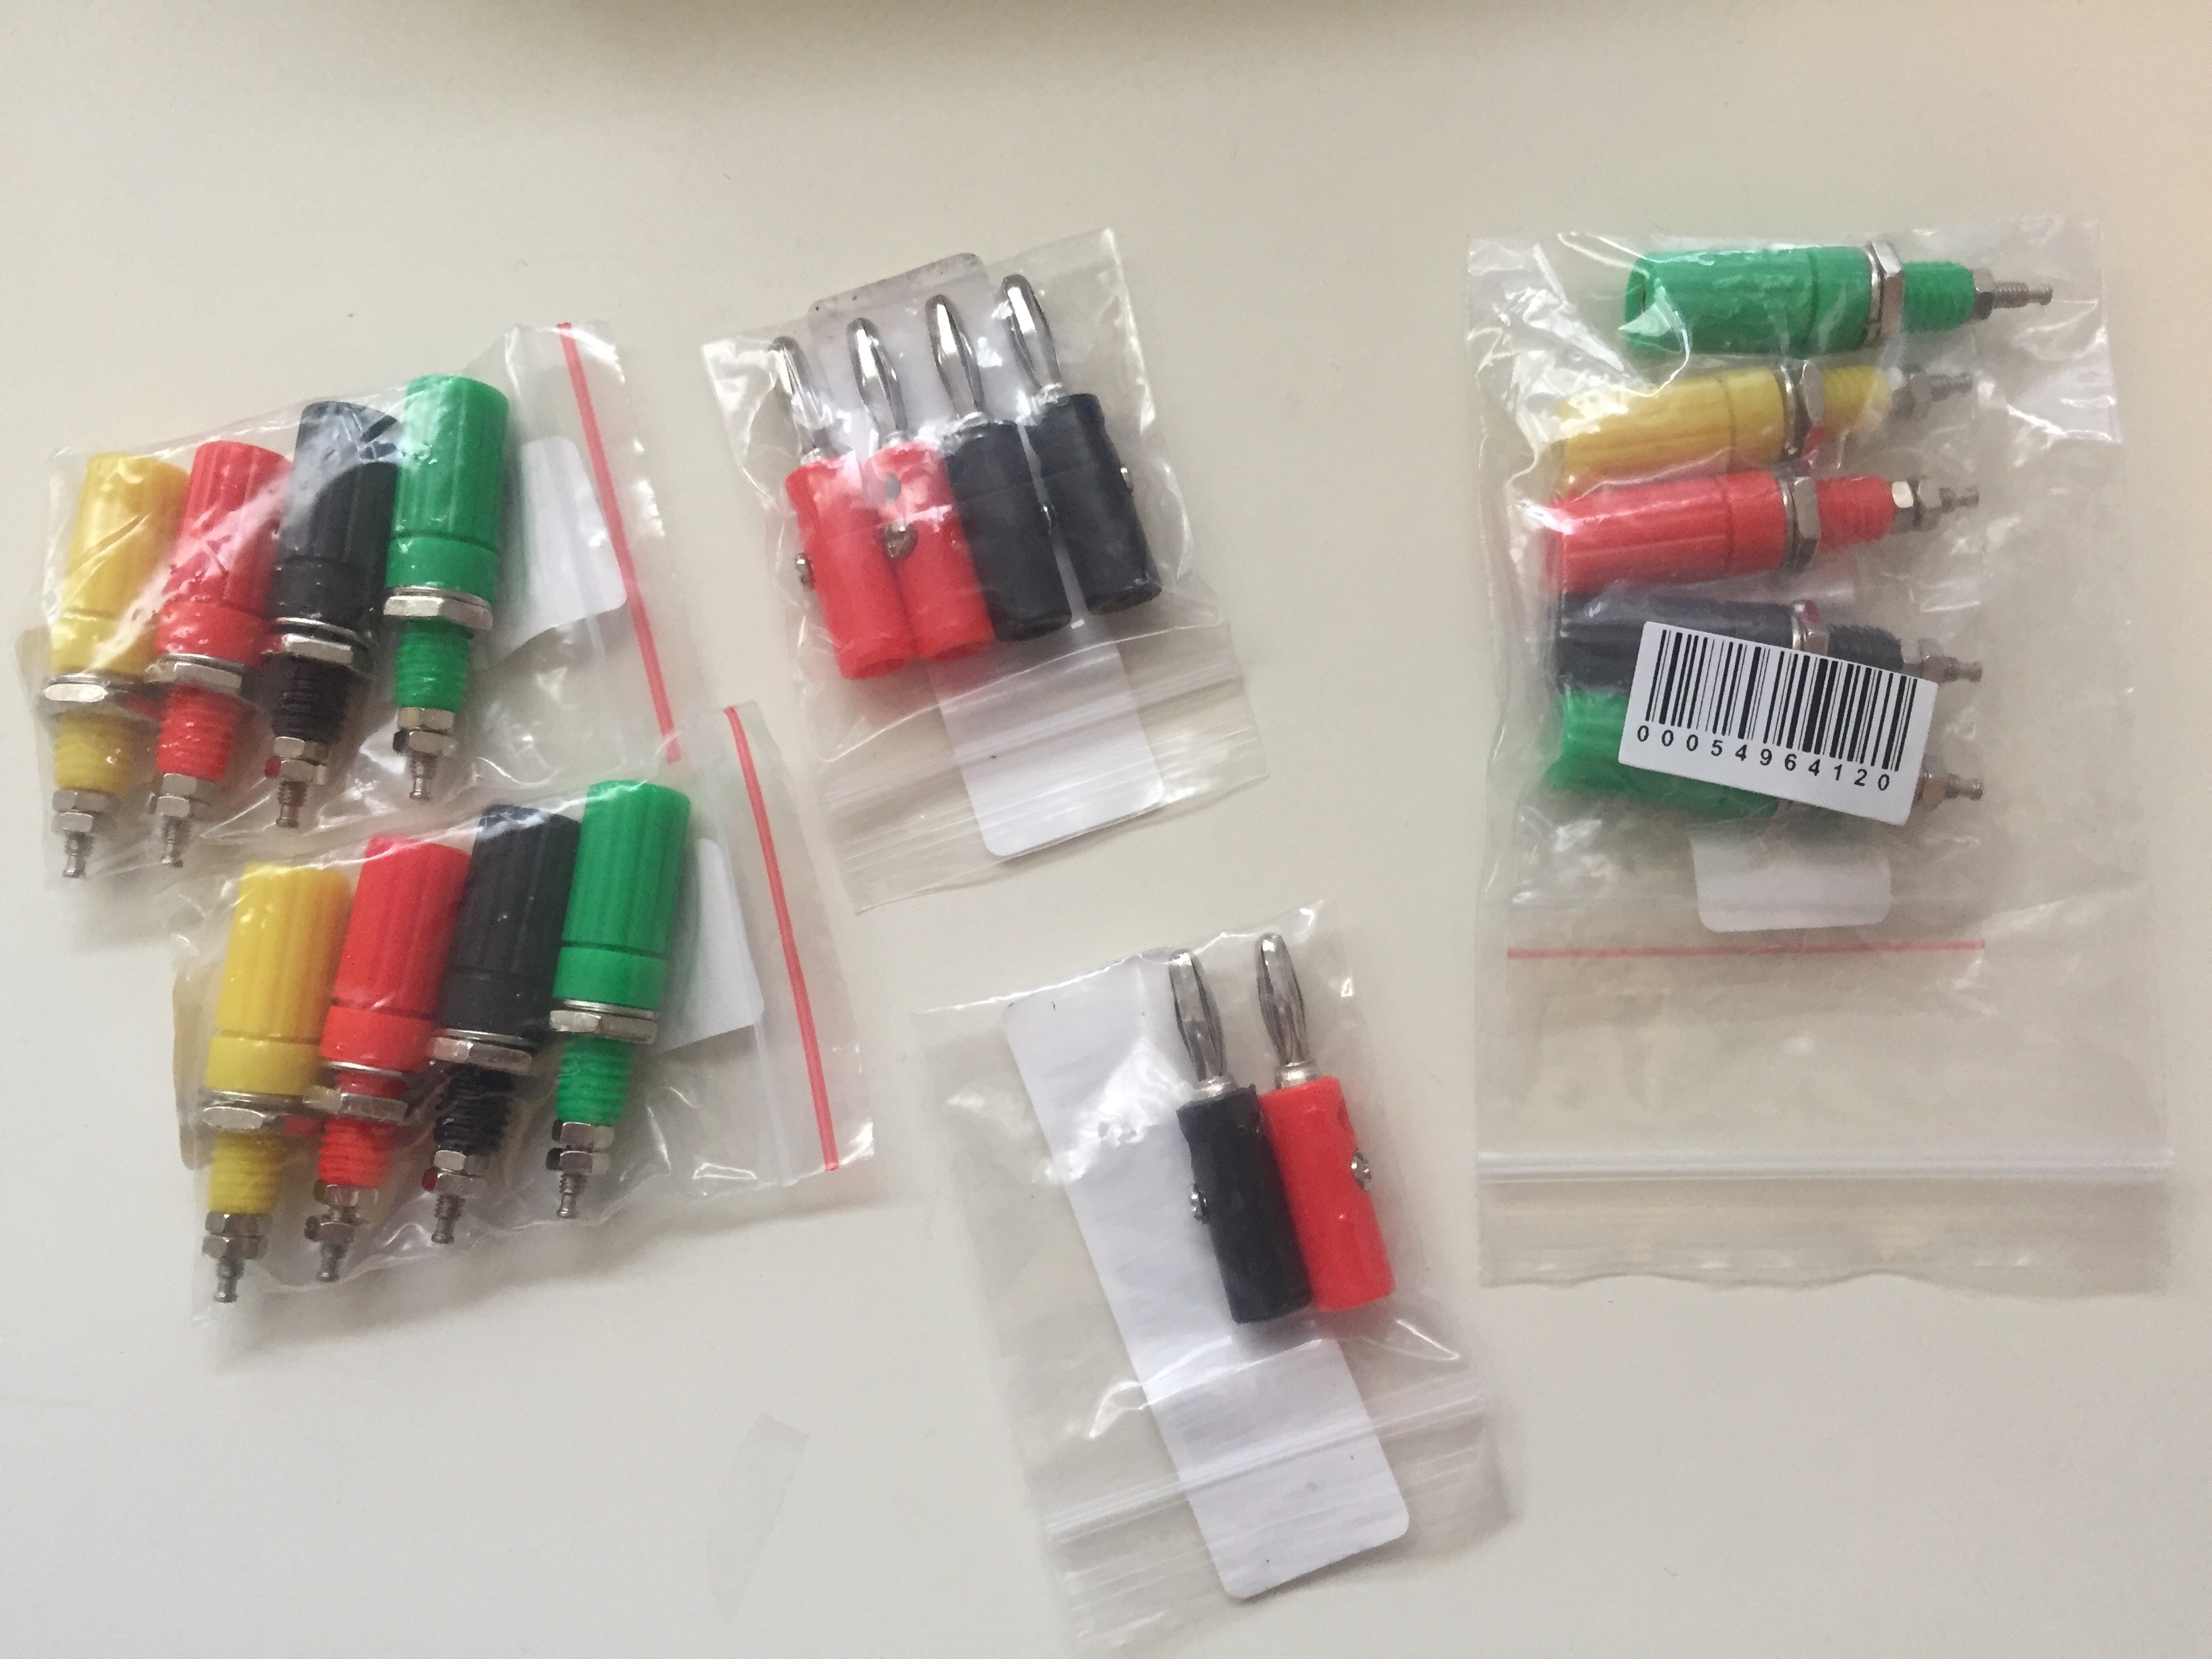
Compré unos conectores como estos y estos los que realmente compré ya no los veo, pero hay miles)
Y para la próxima que me haga, las conexiones las voy a hacer con estas horquillas, que facilitará mucho la vida.
No hice muchas fotos durante el montaje, pero es que es muy básico todo…
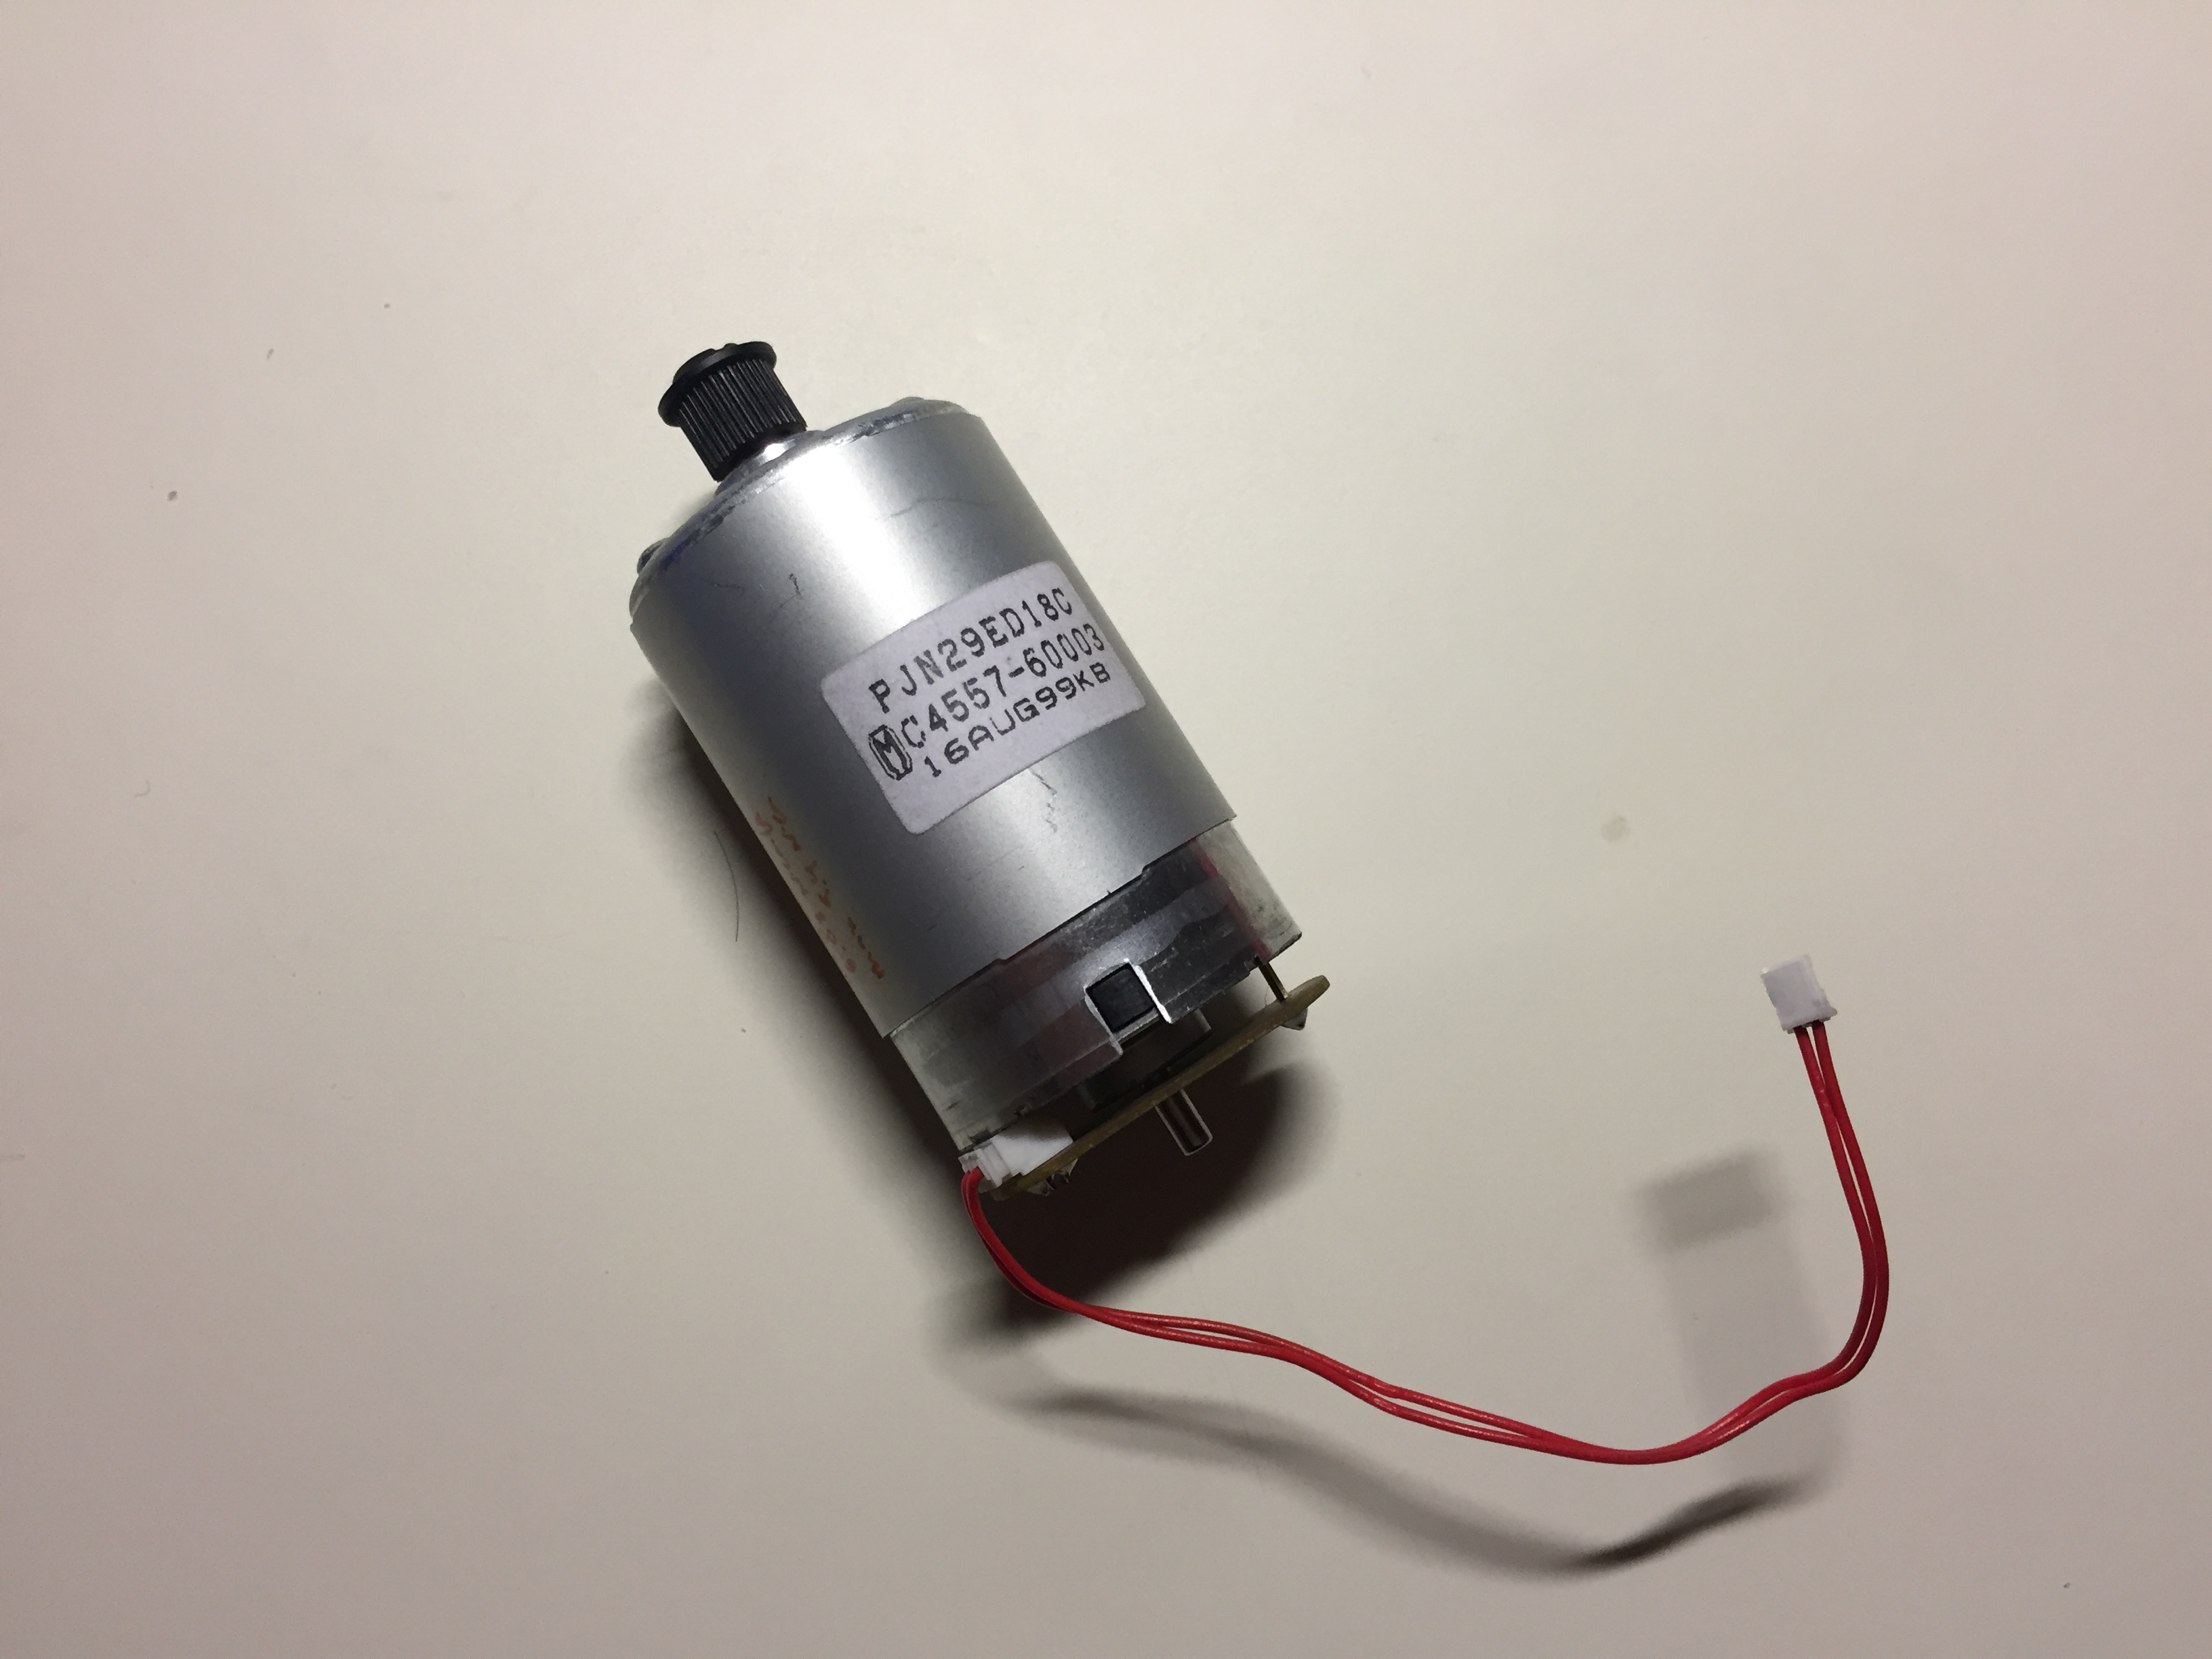
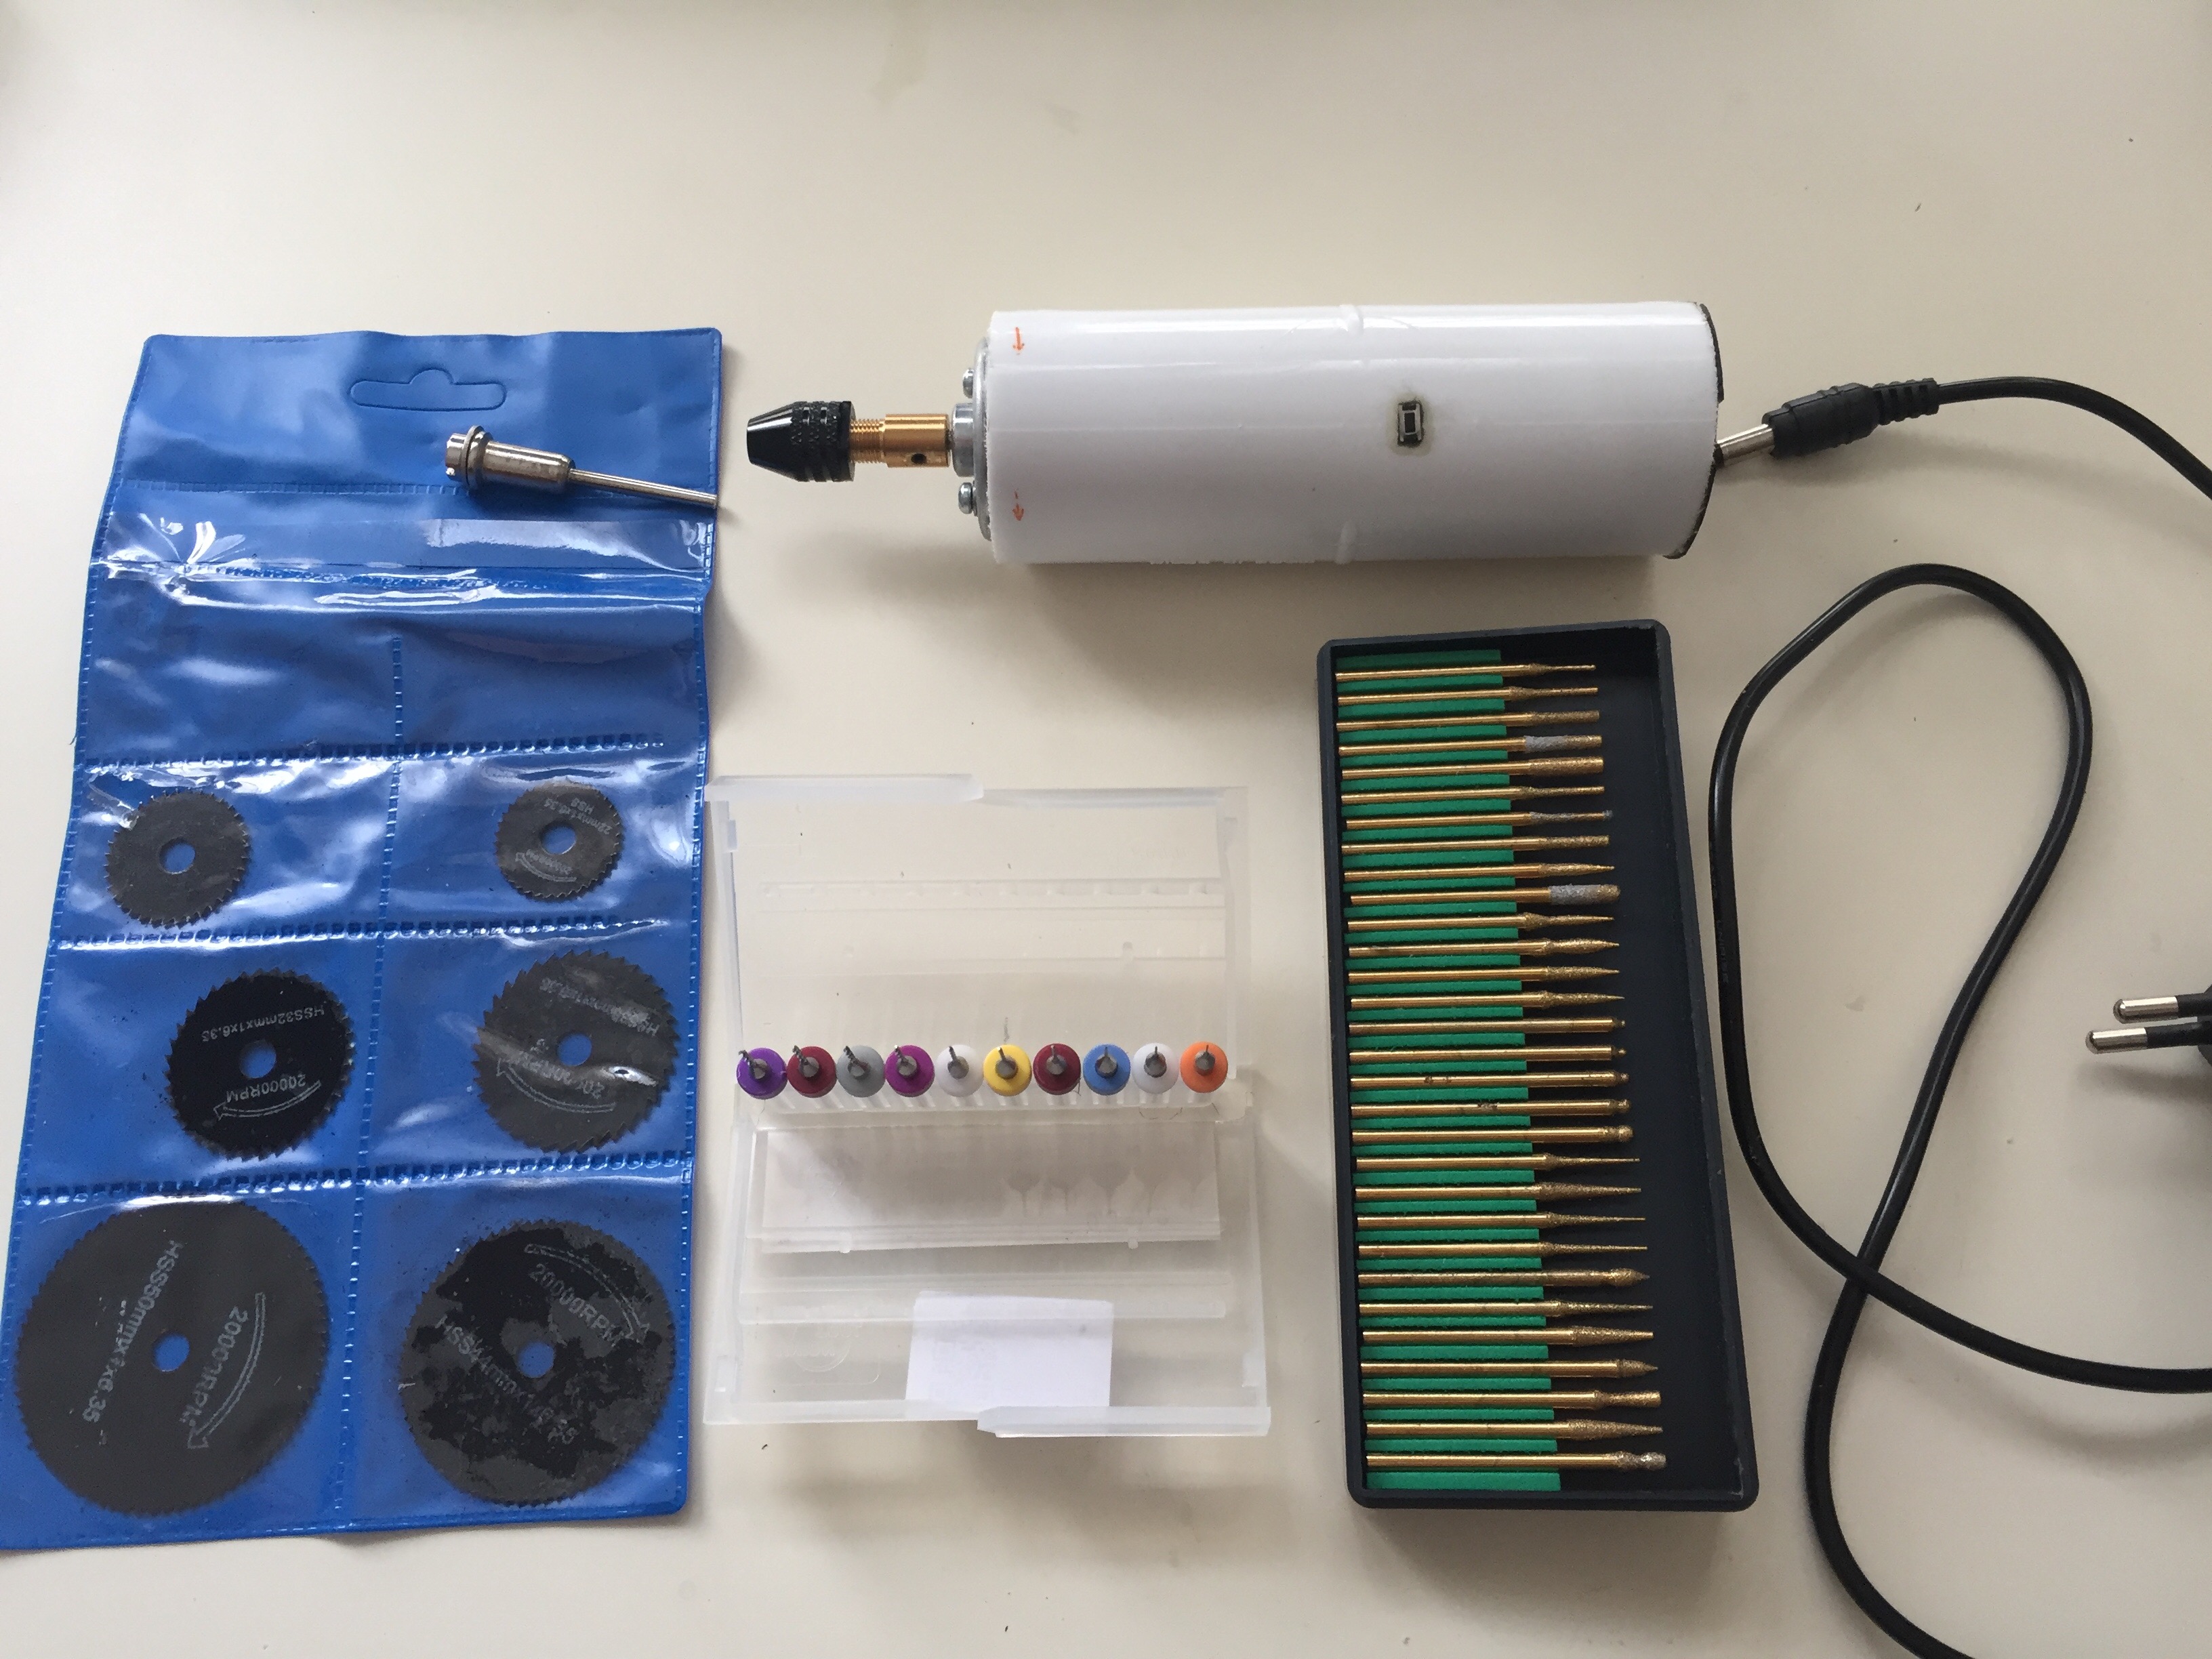
Con un motor que rescaté de una impresora rota me he construido una «dremel»: una herramienta que puede ser un taladro, una fresadora, un lija, un disco de corte…
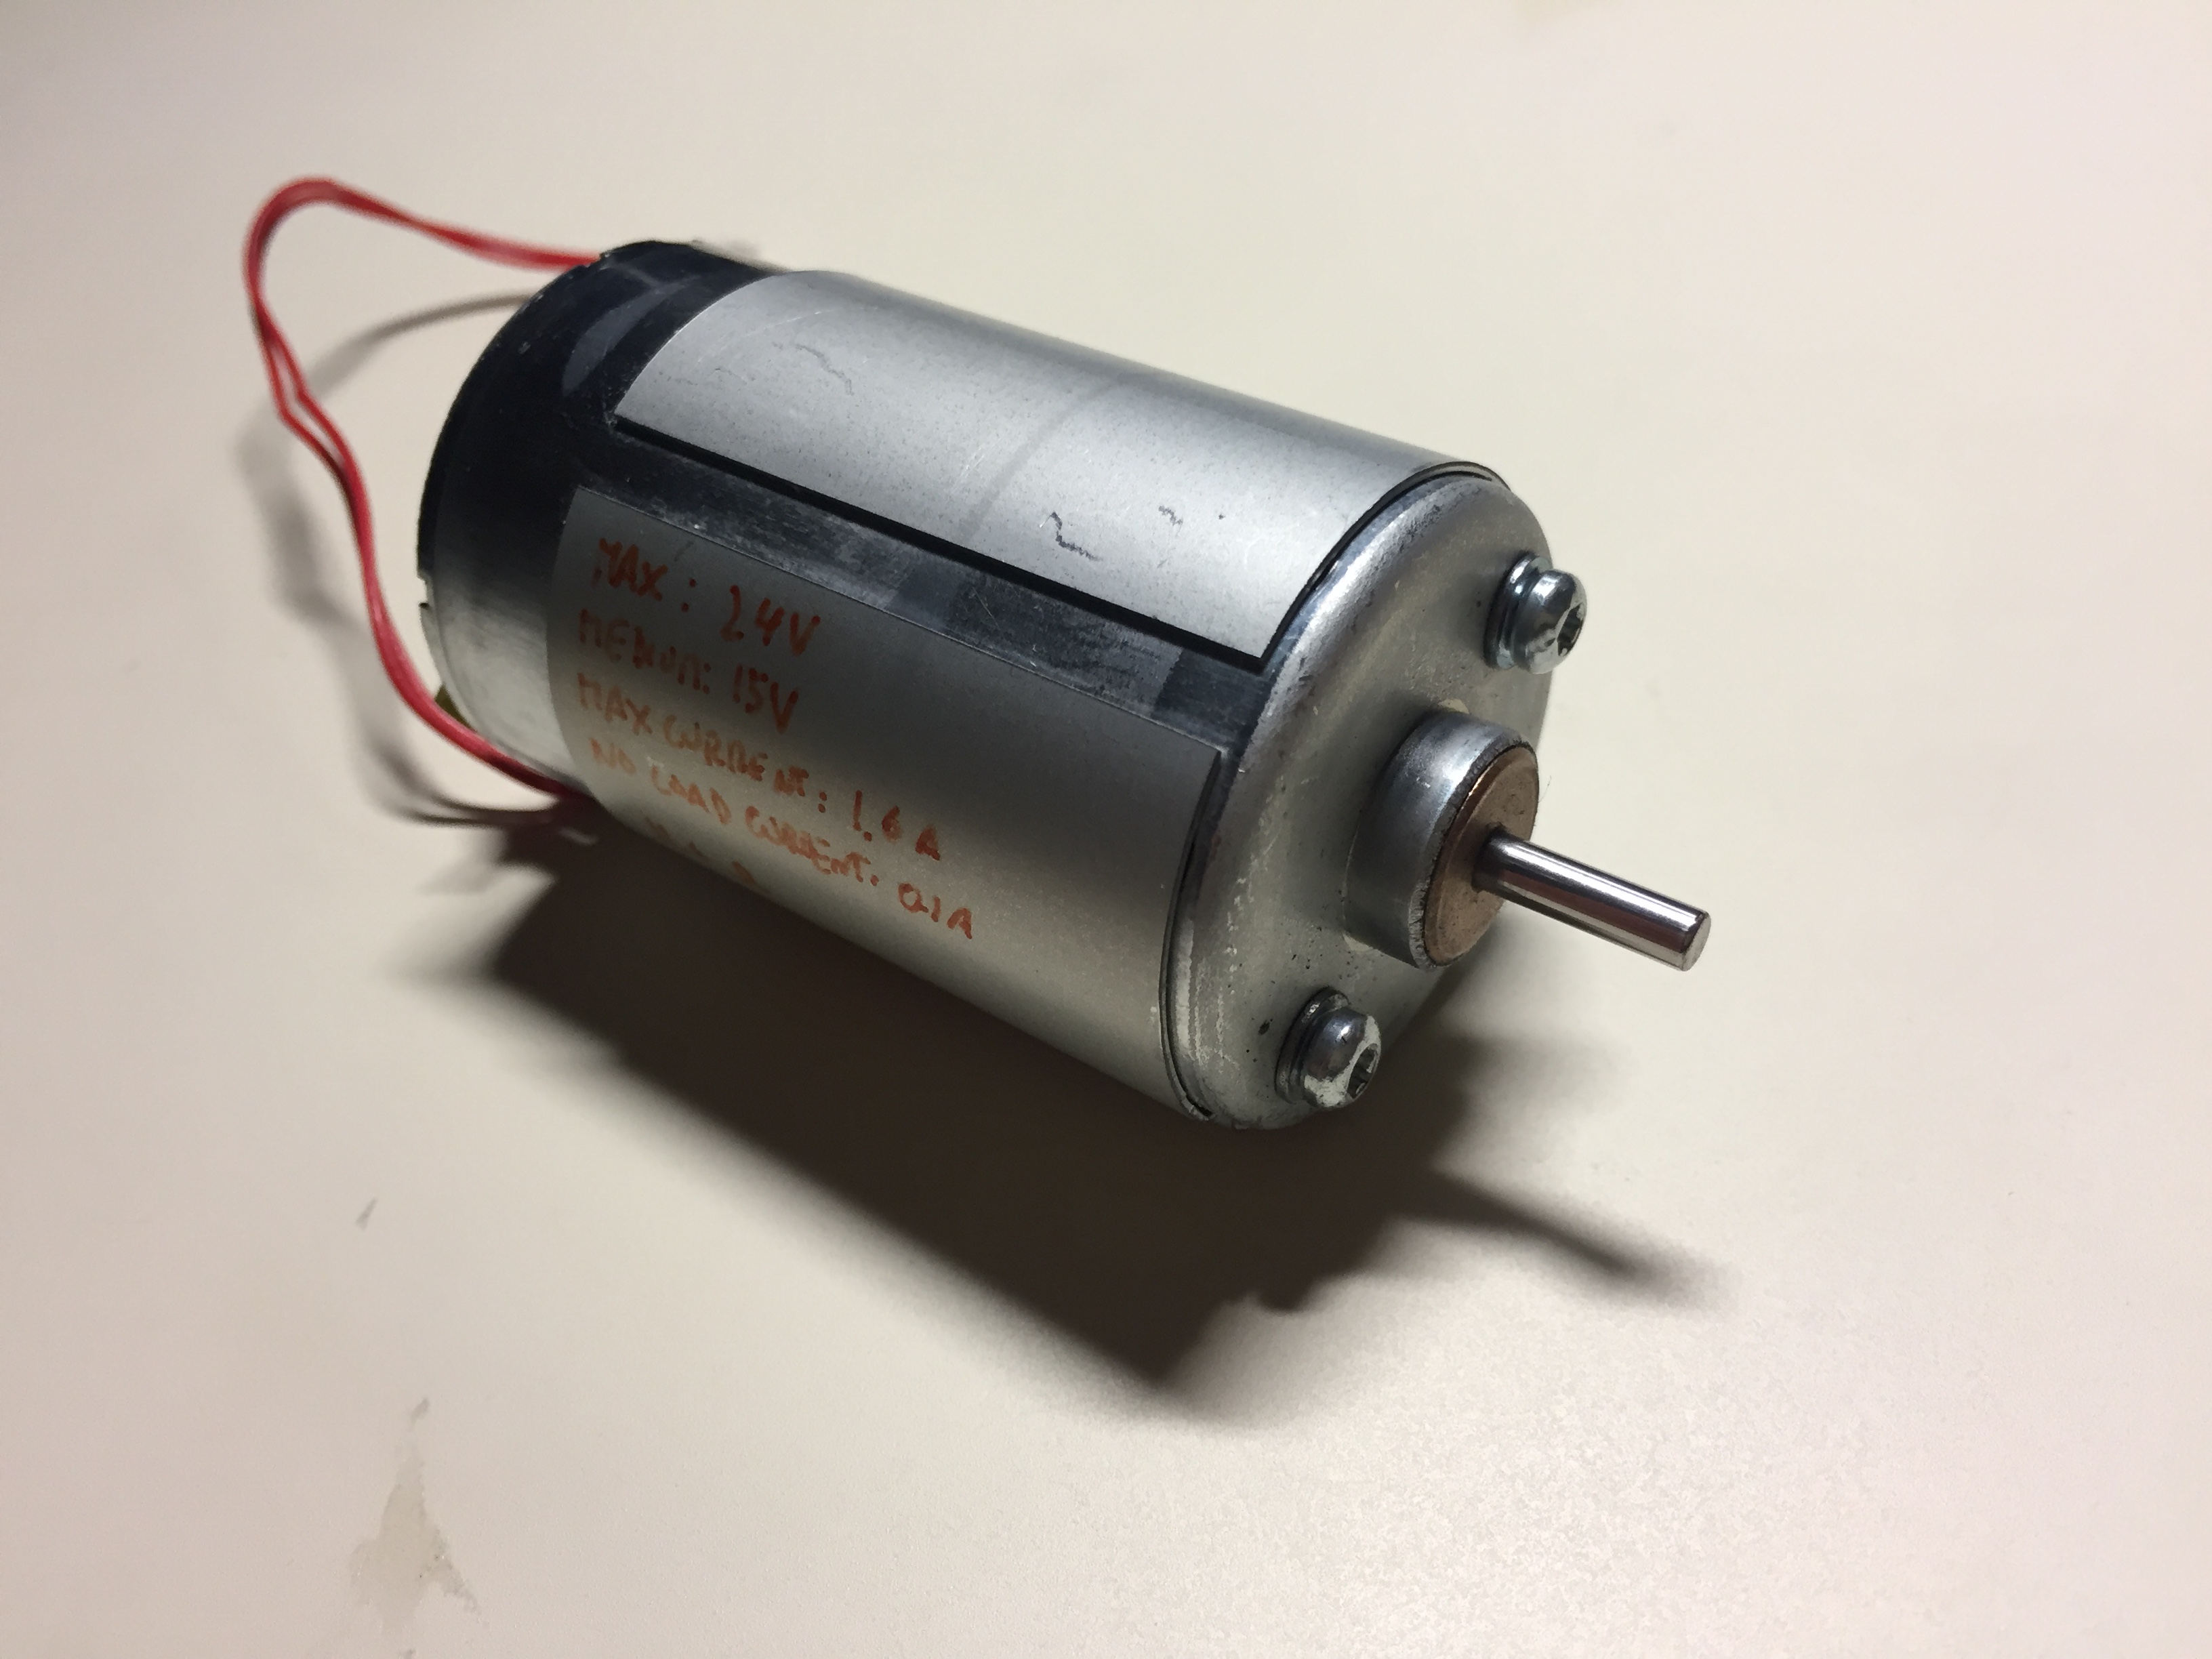
El proyecto es muy básico, pero realmente muy útil y así nos ahorramos la compra de una de estas herramientas. Lo único que hace falta es un motor DC suficientemente rápido, o tubo o similar para sujetarlo, un pulsador, un portabrocas y luego las brocas, discos, fresas o lo que vayamos a necesitas, que tendremos que comprar.
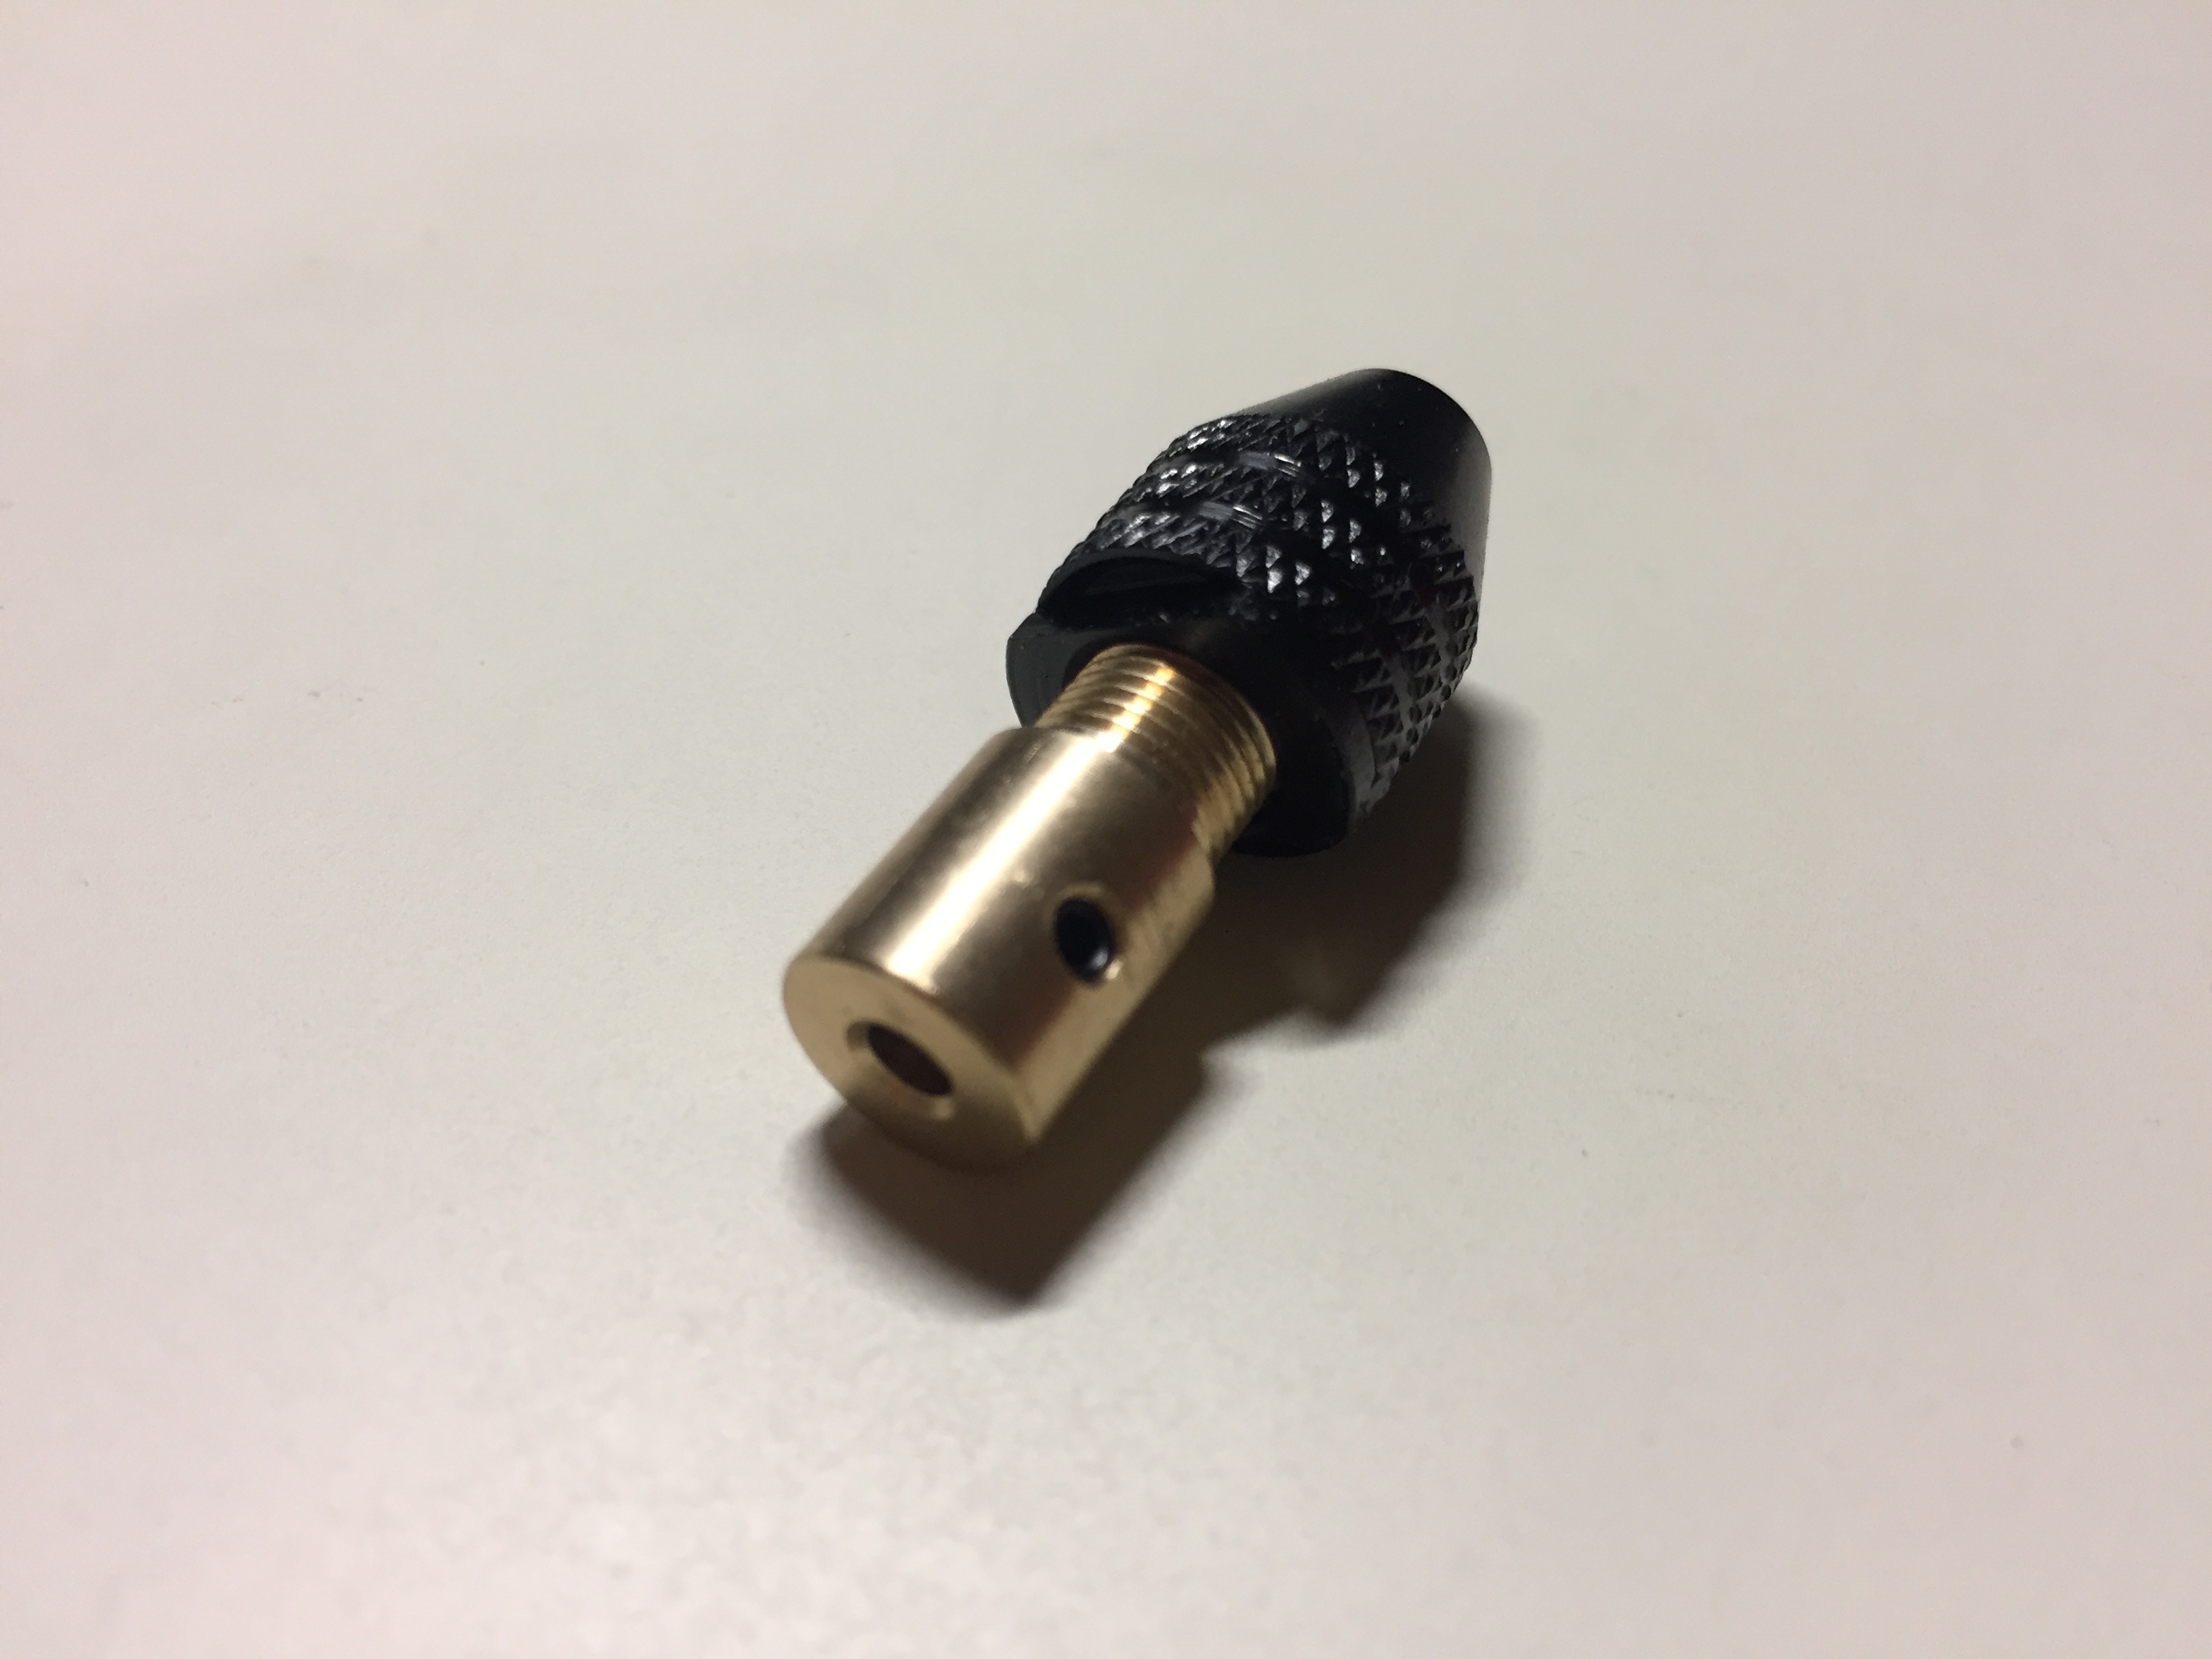
El portabrocas tiene que poder fijarse al eje del motor, por lo que tendrá que ser de un diámetro pequeño. Yo compré uno similar a este por 5.99 €.
Este es el motor que saqué de una impresora:
Le acoplo el portabrocas:
El motor quedaba un poco holgado dentro del tubo, así que enrollé un poco de cable y con esto encajó perfectamente.
Para la tapa, corté un poco de plástico de una caja de CD:
Evolution has no destination. Each time you push the «go» button, you end up someplace different. Start things over on Earth (or another Earth-like planet) and not only would there be different species with perceptions and intelligences that vary wildly from our own, the very chemistry of life would be altered as well!
That’s conjecture – but it’s pretty safe conjecture. To see why, let’s do a quick back-of-the-envelope calculation.
Among other things, our DNA contains instructions for building proteins out of sequences of amino acids. For simplicity, let’s assume that life always evolves that same basic molecular machinery. There are 500 or so known amino acids, of which life on Earth uses only 23. Sticking with our KISS (keep it simple, stupid) approach, let’s assume all life uses those same 23.
The average protein in an eukaryotic (nucleus-containing) cell on Earth is about 450 amino acids long. There are therefore 23^450 (=10^613) different proteins of that length that the machinery of our DNA might construct. That’s a huge number! Not surprisingly, terrestrial life has stumbled upon uses for only a small fraction of those possible proteins – about 10 million.
So now let’s take those 10^613 possible proteins and split them into planet-proportioned groups of 10 million each. With no overlap at all, there would be 10^606 of those piles! There are no more than about 10^23 habitable planets in the entire observable universe. You could spread those stacks of proteins over the planets in 10^583 similar universes without having to duplicate a single protein on any two planets!
The takeaway is this: The likelihood that any two life-bearing planets in the universe share even remotely compatible biochemistry is effectively zero.
Aquí va el arreglo que preparé de «Llevándote» (Kimi wo nosete) de la película de animación «El Castillo en el Cielo» (Laputa, Castle in the Sky), de Hayao Miyazaki. La música es de Joe Hisaishi, y para este arreglo que he hecho para coro, chelo, flauta, guitarra y bajo me basé en el concierto que dio Joe Hisaishi en el Budokan:
La verdad es que podría mejorar la parte instrumental, pero por el momento lo dejo así.
NOTA: Hice este arreglo sin ánimo de lucro. No he cobrado ni cobro por el arreglo, ni permito su uso con ese fin. La autoría de la canción original es de Joe Hisaishi.
The welfare of the earth and its inhabitants is a defining theme for the 21st century. Structural engineering has a significant role to play as the world faces these challenges. In fulfilling this function, building engineers continue the age-old human endeavor to provide society with structures that protect, serve, and inspire mankind. From pioneering new systems for better buildings with economy, to ensuring the safety of human life from nature’s wrath, to stabilizing implausible forms to defy gravity and lateral loads, building engineers venture to create livable spaces from humaninity’s dreams and ideas. Building engineering requires a comprehensive understanding of building assembly and an appreciation of how forces are resisted within the structure and eventually by the earth.
Bungale S. Taranath, «Structural Analysis and Design of Tall Buildings. Steel and Composite Construction». CRC Press, Boca Raton, 2012
Although over the years, experience and research have diminished our uncertainties and concerns regarding the characteristics of earthquake motions and its manifestations, it is unlikely, though, that there will be such a change in the nature of knowledge to relieve us of the necessity of dealing openly with random variables. In a way, earthquake engineering is a parody of other branches of engineering. Earthquake effects on structures systematically bring out the mistakes made in design and construction, even the minutest mistakes. Add to this the undeniable dynamic nature of disturbances, the importance of soil-structure interaction and the extremely random nature of it all; it could be said that earthquake engineering is to the rest of the engineering disciplines what psychiatry is to other branches of medicine. This aspect of arthquake engineering makes it challenging and fascinating, and gives it an educational value beyond its inmediate objectives. If structural engineers are to acquire fruitful experience in a brief span of time, expose them to the concepts of earthquake engineering, even if their interest in earthquake-resistant design is indirect. Sooner or later, they will learn that the difficulties encountered in seismic design are technically intriguing and begin to exercise that nebulous trait called engineering judgment to make allowance for these unknown factors.
Bungale S. Taranath, «Structural Analysis and Design of Tall Buildings. Steel and Composite Construction». CRC Press, 2012, Boca Raton, Florida.
I don’t know if you follow Elon Musk (Tesla, SpaceX…) on Twitter. I do. A few weeks ago he twitted on his way to work -on a Tesla, I suppose- that he was exasperated with Los Angeles traffic, and wondered about boring a tunnel. A moment later he twitted again that he would do it.
Traffic is driving me nuts. Am going to build a tunnel boring machine and just start digging…
It seems now that he’s taken seriously the idea, and this past weekend workers started excavating a test trench at SpaceX headquarters.
I’m somewhat confused about this: being Elon Musk the visionaire and entrepeneur he is in so many different areas (PayPal, Tesla, SpaceX, Hyperloop…) this shouldn’t surprise anyone. But this is civil engineering (tunnel boring) he’s talking now, and he even claims he wants to improve tunneling speed by 500 or even 1,000 percent! Although he did say: «We have no idea what we’re doing – I want to be clear about that» (!!!!???!!!)
What do you think? Is Elon Musk out of his depth this time? Will this new idea fail? Or if it works (I don’t know what innovative technology he wants to try out), will it work on all types of soils/rocks? Something deep in my cartesian/engineer mind tells me that it’s very difficult for someone with no previous (civil) engineering knowledge to suddenly come up with an idea that thousands of engineers and contractors all over the world are struggling with everyday. Or is it?
This is Elon Musk we’re talking about. They said the same things about him and the electric car or about launching rockets and landing them back again… And he proved them wrong. And what about the Hyperloop…? We’ll soon see.
Maybe he will fail in this new tunnel adventure, maybe he wont. But in any case this is exactly what the civil engineering world requires: out-of-the-(cartesian)-box thinking and people like Elon Musk with enough ingenuity -and money- to propose and experiment on new, world-changing ideas.
Let’s keep a close eye on Elon Musk’s latest idea, because it would indeed change our profession and the world!
More info:
https://www.wired.com/2017/01/inside-tunnel-elon-musk-already-digging-los-angeles/
https://www.wired.com/2017/01/elon-musks-plan-tunnel-la-misguided-nonsense/http://gizmodo.com/elon-musk-on-digging-big-ass-tunnel-we-have-no-idea-wh-1791803837
On two occasions I have been asked (by members of Parliament!), «Pray, Mr. Babbage, if you put into the machine wrong figures, will the right answers come out?» I am not able rightly to apprehend the kind of confusion of ideas that could provoke such a question.
Charles Babbage (1791-1871), diseñador de la máquina analítica, precursora del ordenador.
Inventors and Inventions, Volume 1. Marshall Cavendish, 2007
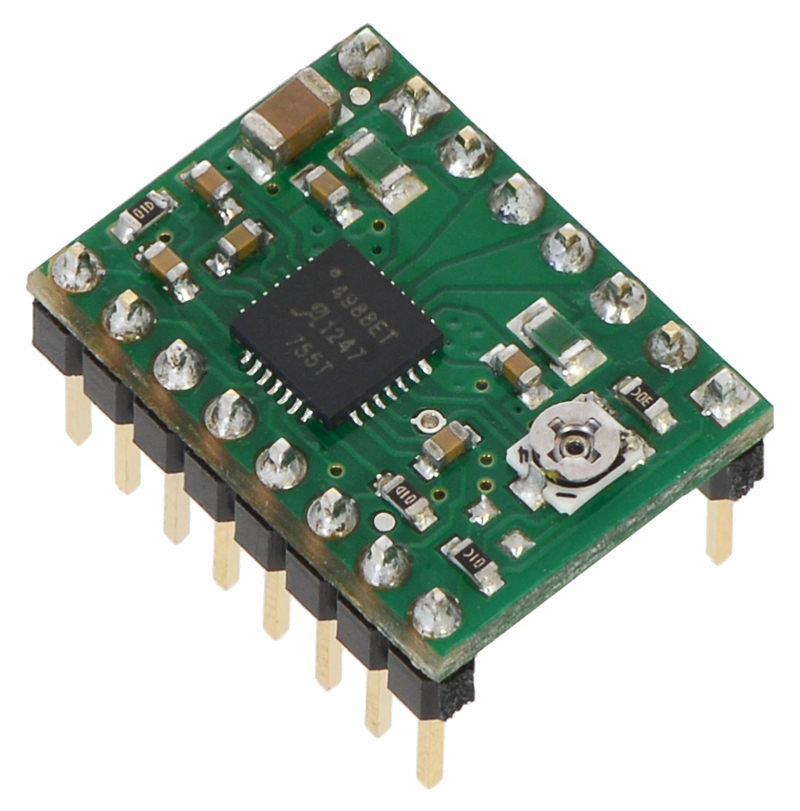
Voy a contar cómo manejar un motor paso a paso (stepper) con Arduino a través de un driver A4988. En esta otra entrada ya expliqué cómo hacerlo con un controlador DRV8825, que es una versión mejorada del A4988 (el DRV8825 admite microstepping has 1/32, frente al 1/16 del A4988, 45V frente a 35V, y 2.5A frente a 2A).
Pololu driver A4988
Características principales del driver A4988:
Para motores bipolares
Permite microstepping de hasta 1/16
2A
Interfaz casi idéntica al DRV8825
35 V máximo
Control de corriente máxima con un potenciómetro
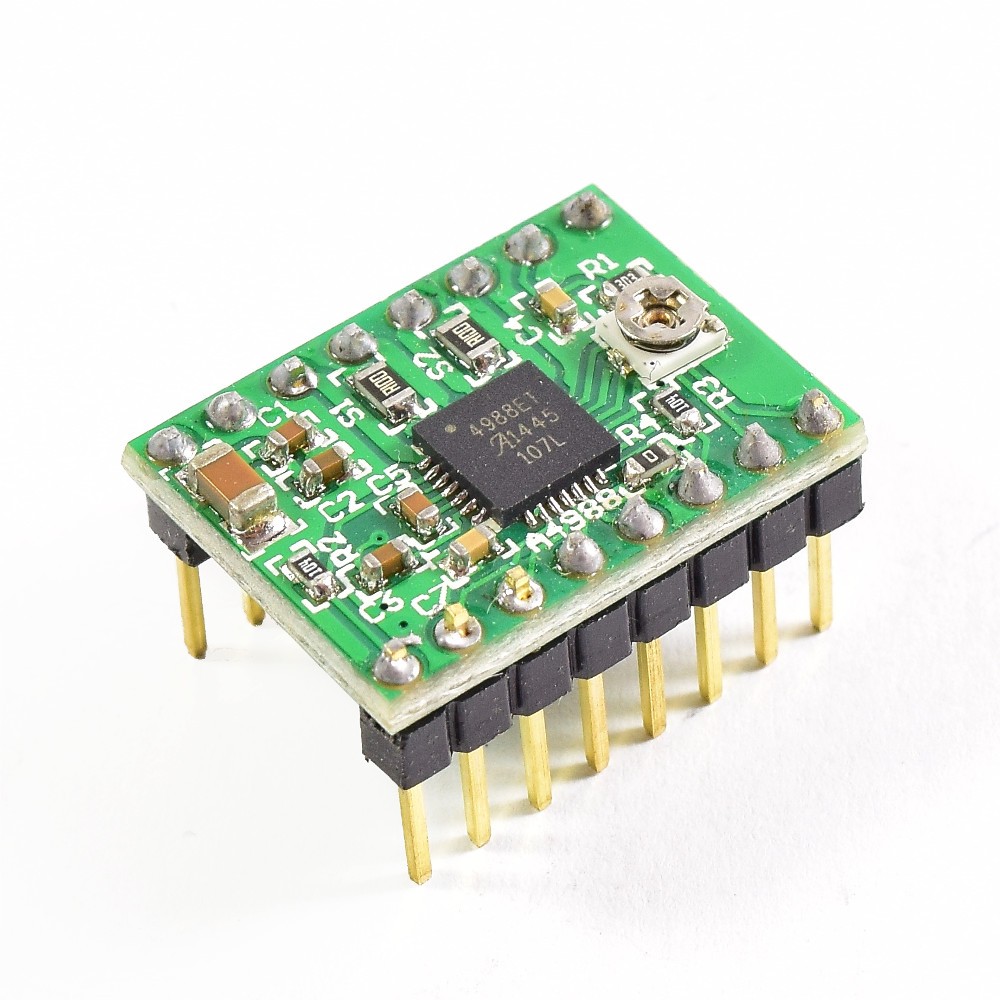
Nota importantísima: los datos anteriores, en especial el del límite de 2A es para los A4988 en los módulos Pololu (algo más caros). Hay una variante muy común que son los StepStick (más baratos, y seguramente es este el que tienes si lo has comprado de China). y la principal diferencia es que su límite es de 1A. Así que mucho ojito.
Stepstick driver A4988
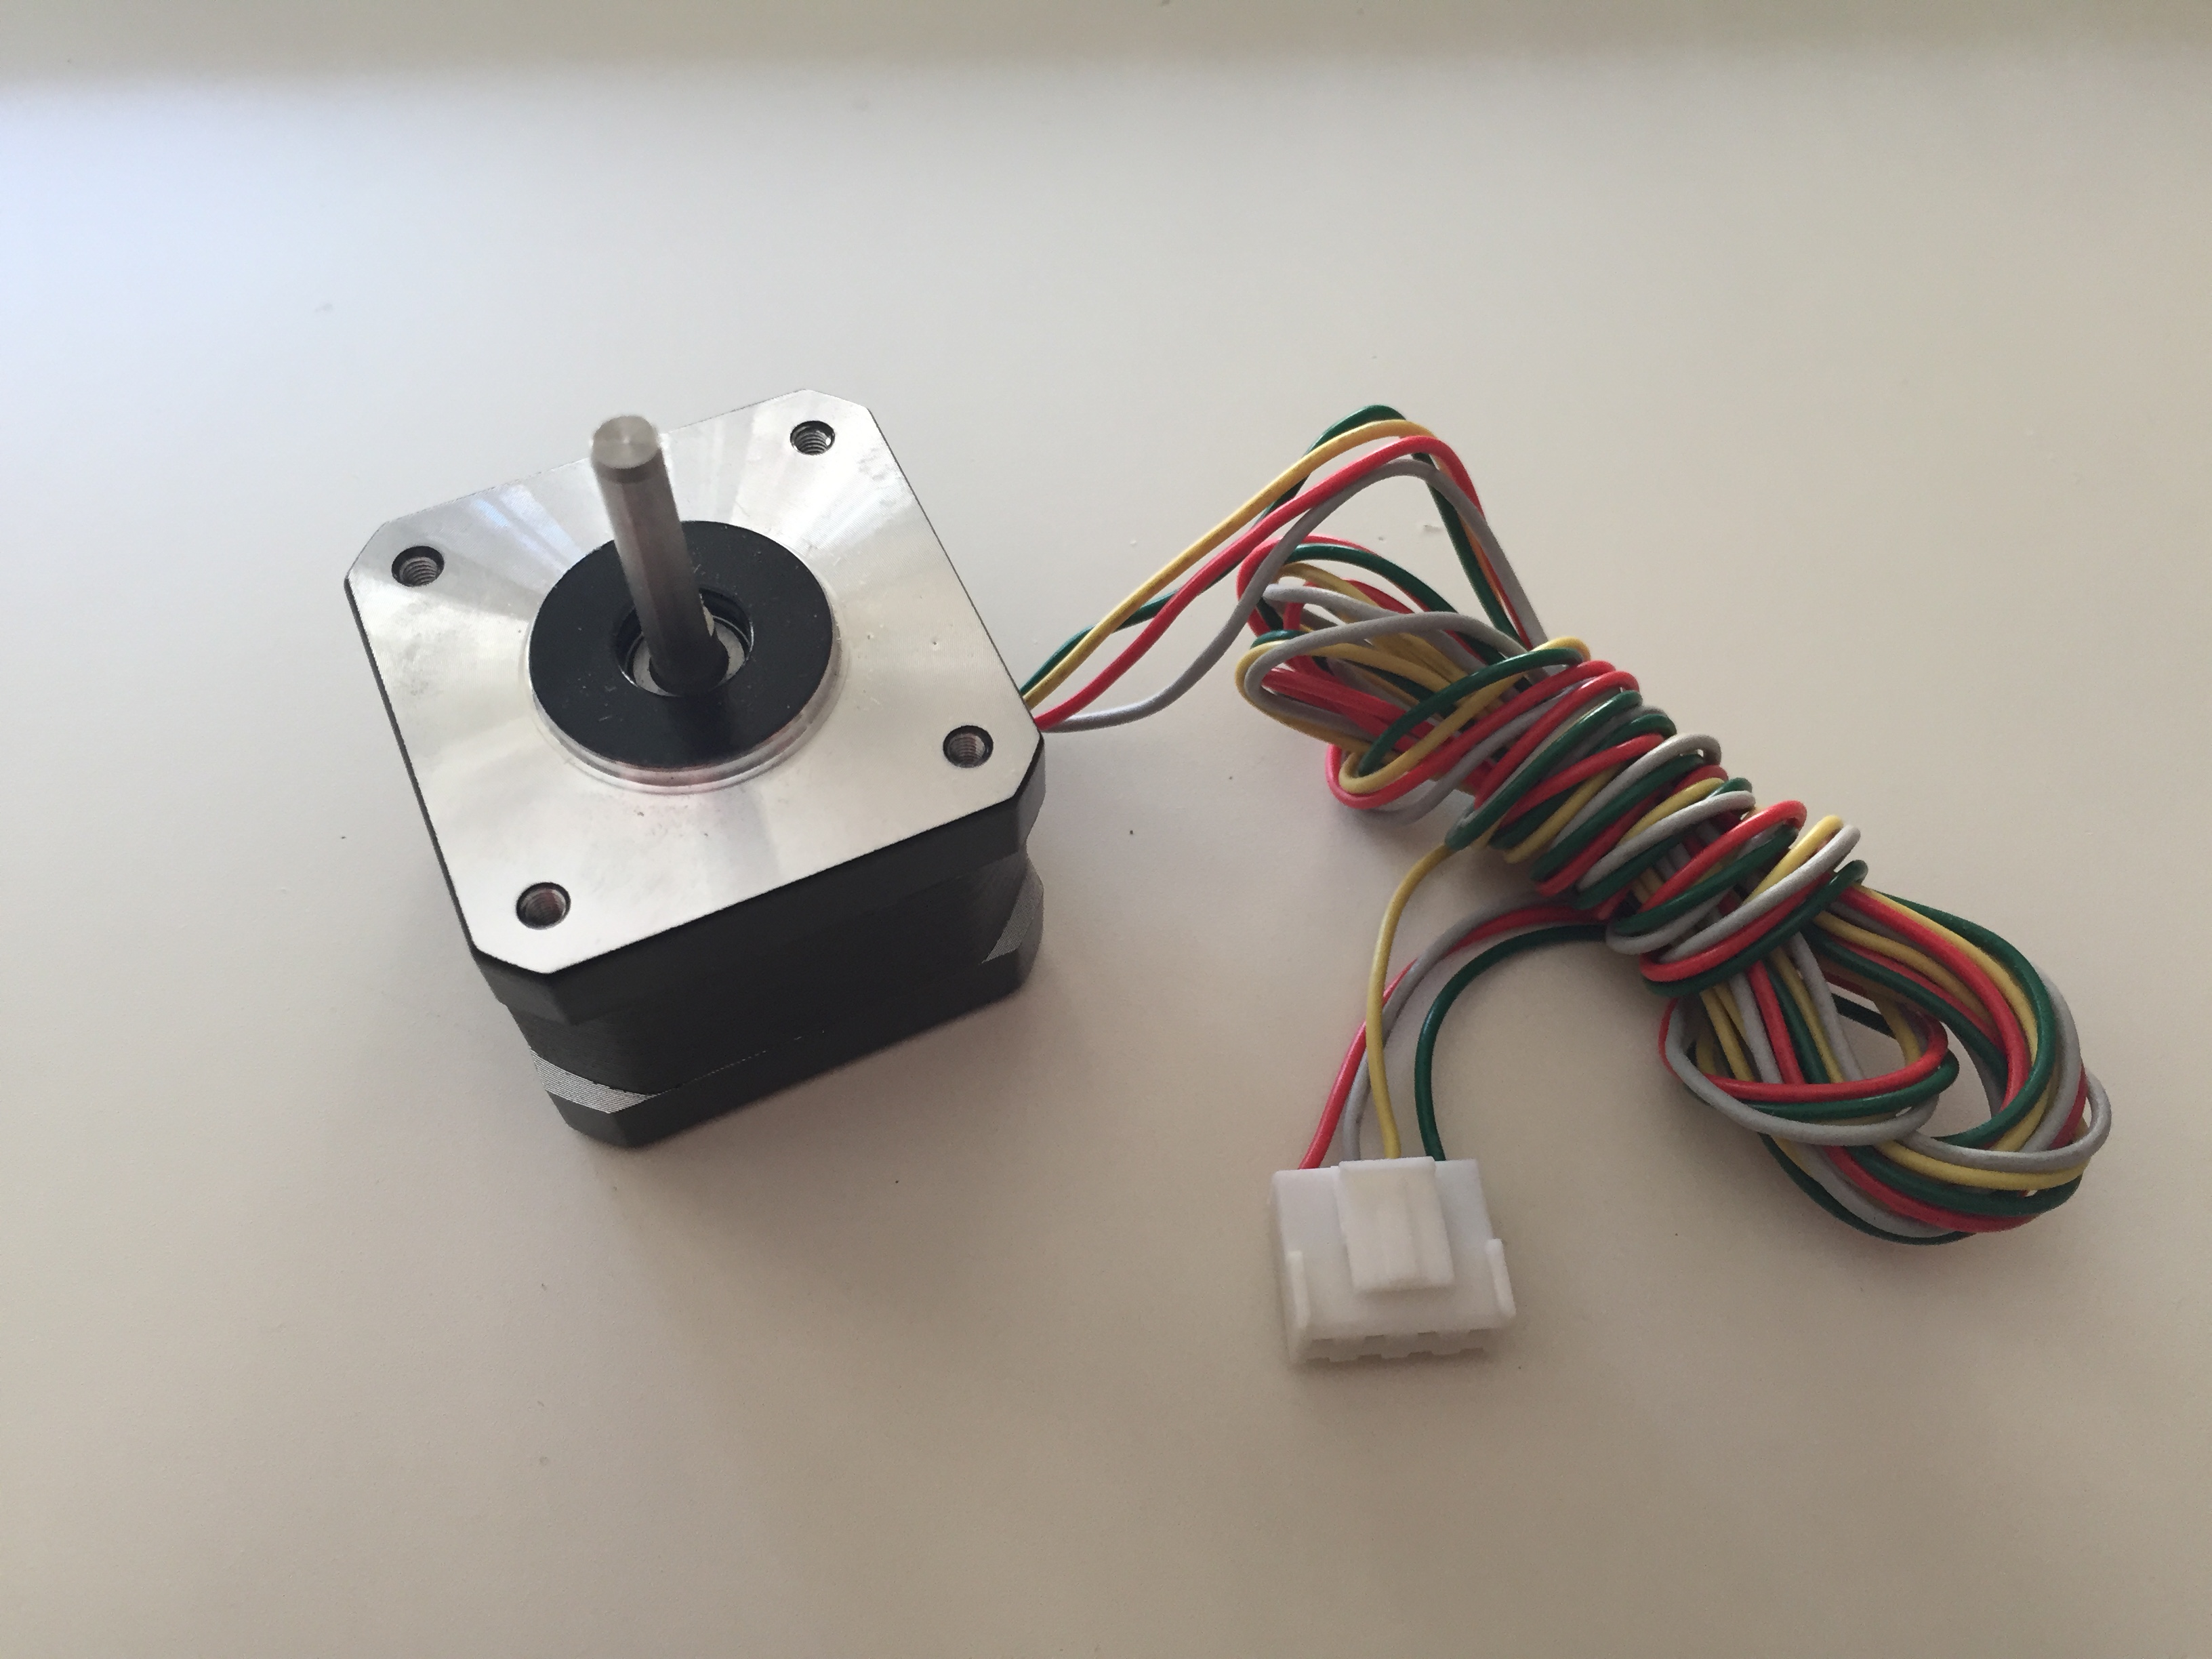
El motor que voy a usar es un motor NEMA 17 GZGW09, comprado aquí por 13.50 €, pero valdría cualquier motor bipolar de 4 cables.
Driven X-axis and Y-axis movement, sprinkler wire wheel to scroll
Great for DIY project
Dimensions: 5.8 cm x 4.2 cm x 4.2 cm
Weight: 220 g
Para alimentar el motor empleo una fuente de alimentación de un ordenador (ver esta entrada).
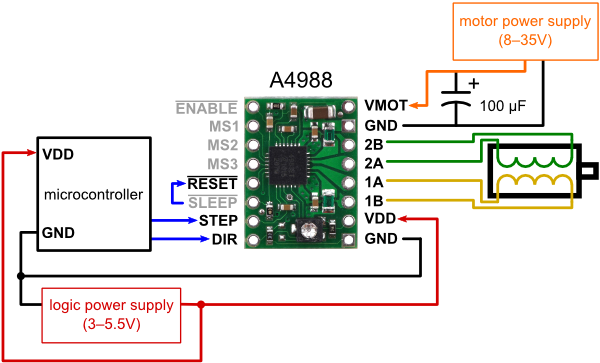
Siguiendo las instrucciones de Pololu, voy a emplear el siguiente esquema de conexión, con paso completo (sin microstepping):
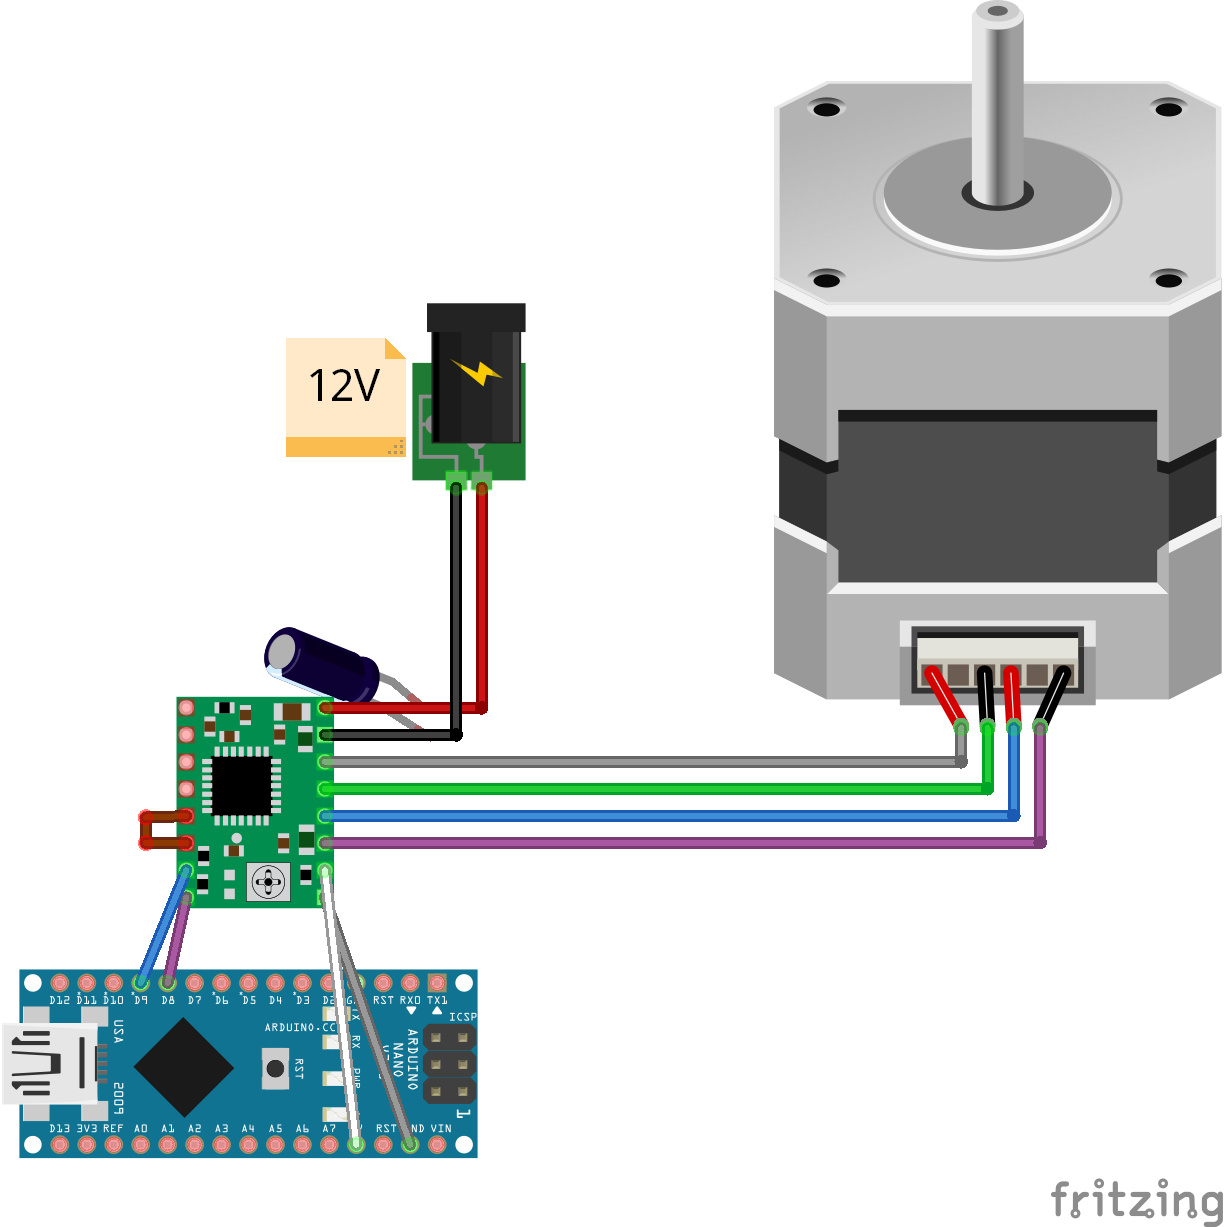
Empleo un Arduino Nano, pero valdría cualquier otro. Uso el pin 8 para la dirección y el 9 para el step. El esquema Fritzing sería así:
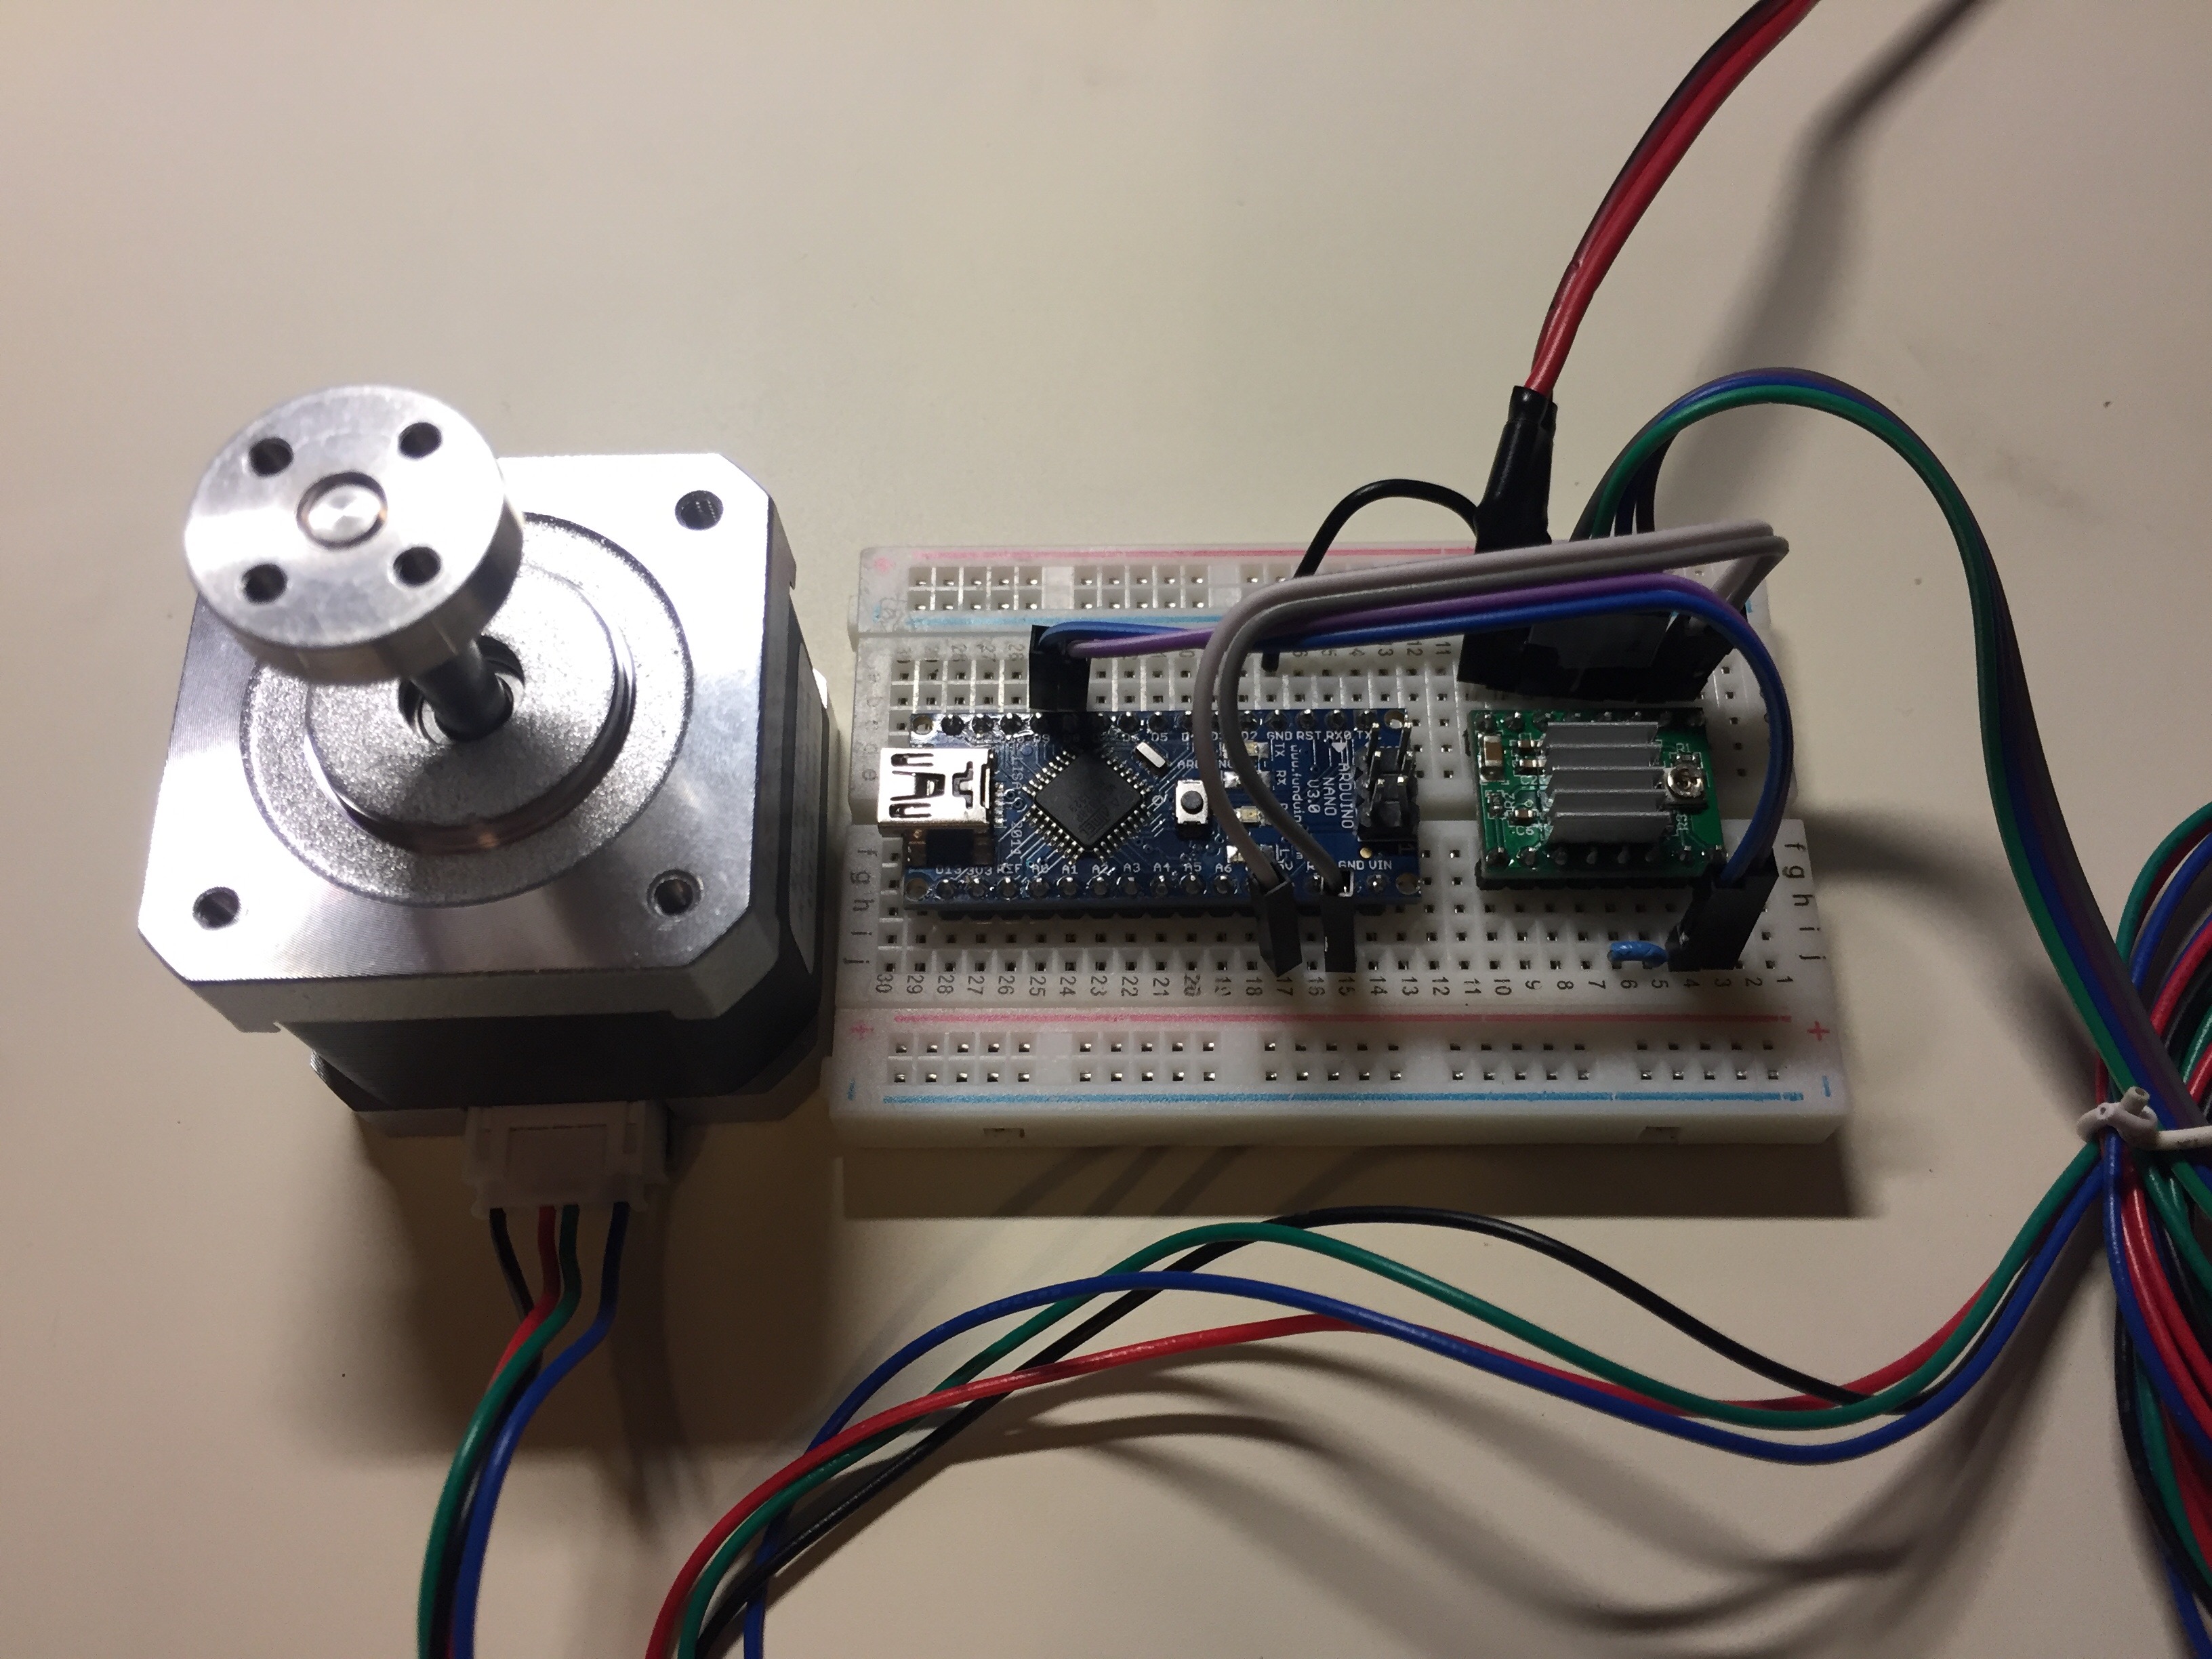
La conexión de los cables del motor al StepStick A4988 la hago así:
1A: rojo (morado)
1B: gris (gris)
2A: amarillo (blanco)
2B: verde (negro)
Para no dañar el motor tenemos que regular inicialmente el potenciómetro a la mínima potencia, girando el potenciómetro en sentido antihorario hasta el final, y más adelante ajustarlo hasta la capacidad del motor. En este vídeo se explica cómo regular adecuadamente la intensidad.
Lo primero es determinar el chip que realmente tenemos, pues cambia mucho si es un Pololu o un StepStick.
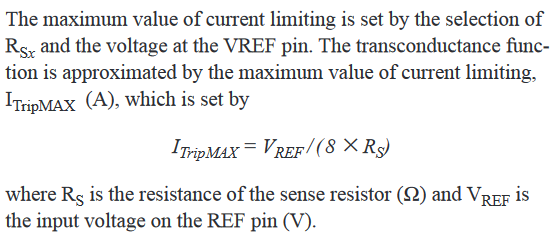
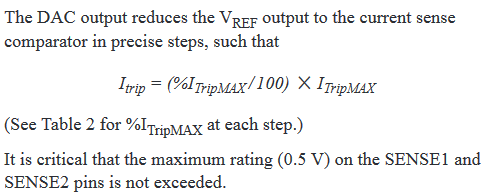
En la hoja de especificaciones se dice:
El Pololu tiene un valor de para la resistencia de censado SMD de 0.05 Ω (si se fabricó a partir de enero de 2017, entonces 0.068 Ω), mientras que en el StepStick es de 0.2 Ω. Lo mejor es mirarlo en la propia placa.
Así pues, en mi caso, tengo un StepStick (Rs= 0.2 Ω), y la intensidad máxima para mi motor de 0.84 A.
Pero ojo, el valor de la intensidad que hemos empleado antes es la máxima. En función de qué configuración de microstepping vayamos a usar, se podrá emplear otro valor.
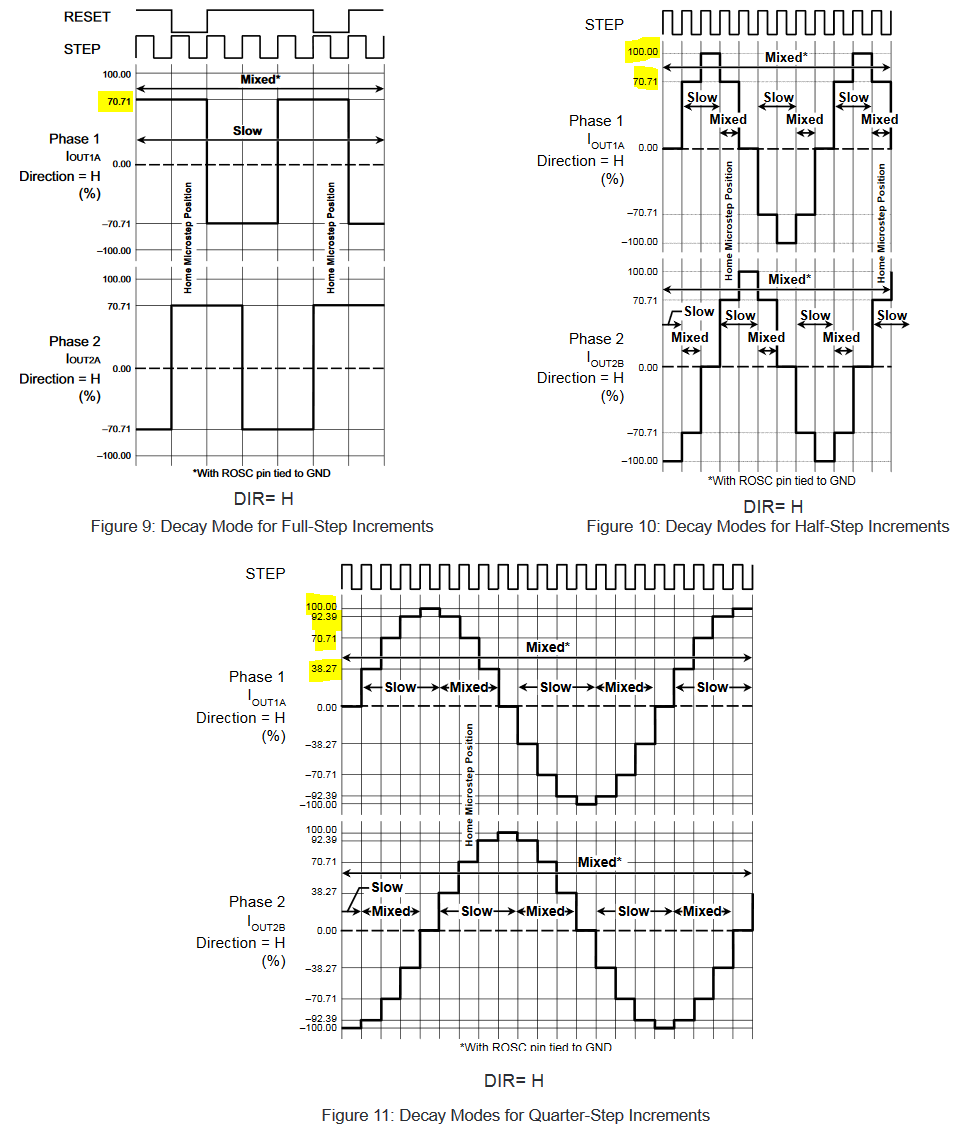
Así, si empleamos pasos completos sin micro pasos, vemos que la tensión va variando en cada micropaso (también se puede consultar una tabla en las especificaciones):
Si emplease pasos completos y no micro pasos, entonces la tensión máxima que se entrega al motor es de un 70.71%.
Y entonces, si voy a emplear pasos completos tendré que ajustar el voltaje a:
Para medir este voltaje, lo hacemos con el multímetro sobre el potenciómetro y sobre tierra, y ajustamos el potenciómetro hasta la VREF calculada antes (0.95 V).
Ya tengo el driver ajustado a mi motor para pasos completos, así que ya puedo conectarlo y empezar a utilizarlo.
Cargando el siguiente código a Arduino, el motor da una vuelta completa en una dirección, y luego cambia de dirección y da otra vuelta:
const int dirPin = 8;
const int stepPin = 9;

const int steps = 200;
int microPausa = 1000;

void setup() {
 pinMode(dirPin, OUTPUT);
 pinMode(stepPin, OUTPUT);
}

void loop() {
 digitalWrite(dirPin, HIGH);  // Establezco una dirección

 for (int x = 0; x < steps ; x++) {
   digitalWrite(stepPin, HIGH);
   delayMicroseconds(microPausa);
   digitalWrite(stepPin, LOW);
   delayMicroseconds(microPausa);
 }
 delay(1000);

 digitalWrite(dirPin, LOW);  // Cambio la dirección

 for (int x = 0; x < steps ; x++) {
   digitalWrite(stepPin, HIGH);
   delayMicroseconds(microPausa);
   digitalWrite(stepPin, LOW);
   delayMicroseconds(microPausa);
 }
 delay(1000);

}
Y un vídeo mostrando el motor en movimiento con el código anterior: